The Anatomy of a Phantom Leak: Why Your Attic Joints are Failing
You hear it before you see it. That rhythmic tap-tap-tap on the ceiling drywall at 2:00 AM while a Nor’easter is howling outside. By morning, there is a tea-colored stain spreading across your white paint. Most homeowners call local roofers and ask for a quick patch, thinking a glob of tar will fix the issue. But as a forensic roofer who has spent three decades peeling back layers of failure, I can tell you that water doesn’t just ‘fall’ through a hole. It negotiates its way in. It uses capillary action to climb uphill under shingles and exploits the thermal expansion of your attic joint seals. If your roofing companies aren’t talking about the physics of hydrostatic pressure at the gable-to-wall transition, they aren’t fixing your leak; they are just charging you for a temporary Band-Aid.
“A roof is only as good as its flashing.” – Old Roofer’s Adage
My old foreman used to say, ‘Water is patient. It will wait for you to make a mistake.’ He was right. I’ve seen 100-square commercial jobs fail because one guy got lazy with a tube of caulk at a critical joint. When we talk about attic joint seals, we are talking about the high-stress areas where different planes of the roof meet—valleys, dormer walls, and chimney saddles. In cold climates like ours, these joints are the front lines of the war against ice dams. When warm air leaks from your living space into the attic, it creates a ‘hot spot’ that melts the snow on the roof. That water runs down until it hits the cold eave, freezes, and backs up. If your joint seals aren’t airtight and watertight, that backed-up water will find a ‘shiner’—a misplaced nail—and follow it right down into your insulation.
1. Mechanical Flashing Over Chemical Sealants
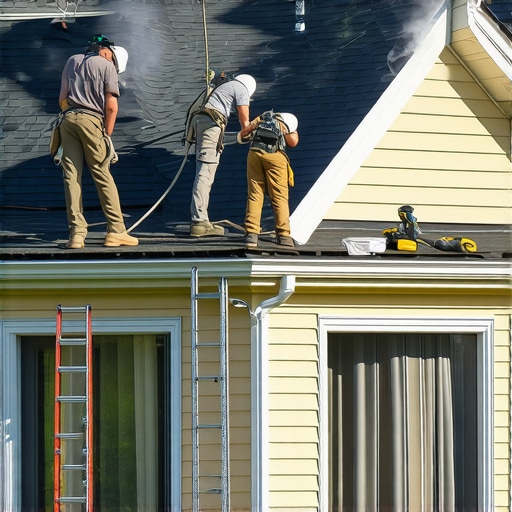
The biggest mistake I see ‘trunk slammer’ roofing companies make is relying on ‘caulk-and-walk’ tactics. They pump a joint full of cheap silicone and call it a day. In the roofing world, we call this ‘the glop method.’ The problem is that shingles, wood decking, and metal flashing all have different coefficients of thermal expansion. In a single 24-hour cycle, your roof can swing 60 degrees. Silicone can’t handle that movement for long before it shears away from the substrate. To truly stop water entry, you need mechanical flashing. This means metal—copper, galvanized, or aluminum—layered in a shingle-fashion so that gravity does the work, not a chemical bond. If you see a roofer reaching for a caulk gun before a tin snip at a major joint, send them home. You need to ensure they secure roof valley flashing properly using a W-profile or a closed-cut method that redirects water away from the vulnerable seam.
2. The Integration of Ice and Water Shield at the Decking Joint
If you live in a region where the mercury spends half the winter below 32°F, the joint where the roof deck meets the fascia or a vertical wall is a massive failure point. Modern building codes require a self-adhering polymer-modified bitumen underlayment, commonly known as Ice and Water Shield. But just slapping it down isn’t enough. It has to be ‘lapped’ correctly. We zoom in on the mechanism here: the membrane must be tucked behind the wall flashing and over the drip edge. This creates a secondary water barrier. If water gets past the shingles—which it will during a heavy wind-driven rain—it hits this membrane and is channeled safely off the roof. Without this, you end up with unforeseen wood rot that eats your rafters from the inside out. I’ve seen plywood that looked fine from the ground but felt like a wet sponge once we stepped on it because the joint seal was missing that critical membrane overlap.
3. Managing Attic Bypasses and Thermal Bridging
Stopping water entry isn’t just about what’s happening outside; it’s about the physics inside your attic. An ‘attic bypass’ is a hidden gap in your home’s thermal envelope—like around a chimney or a plumbing vent—that allows warm, moist air to escape into the cold attic. This moisture condenses on the underside of your roof deck, often right at the joint seals. It looks like a leak, but it’s actually ‘attic rain.’ To fix this, local roofers need to use fire-rated spray foam or specialized gaskets to seal these joints. If you don’t, that moisture will eventually cause hidden decking plywood decay. When I do a forensic audit, the first thing I check isn’t the shingles—it’s the R-value and the seal of the top plates in the attic. If the attic is breathing 70-degree air while it’s 10 degrees outside, your joint seals are going to fail due to frost-thaw cycles regardless of how many shingles you stack on top.
“The building envelope must be considered as a continuous system, not a collection of parts.” – International Residential Code (IRC) Commentary
4. High-Solids Polyether Sealants for Transition Points
There are times when you must use a sealant, such as around a ‘cricket’ (a small peaked roof structure behind a chimney) or where a lead pipe boot meets the roofing material. In these cases, the cheap stuff from the big-box store won’t cut it. You need a high-solids polyether sealant. These are ‘moisture-cure’ products, meaning they actually get stronger when they are exposed to damp air—perfect for a roofing environment. They have a 500% elongation rate, meaning they can stretch and contract without tearing. If you ignore the quality of the sealant at the joint, you’ll eventually deal with sagging rafters because water has been slowly seeping into the grain of the wood for years. A ‘shiner’ or a missed nail at these transition points acts like a straw, drawing water into the attic through capillary action. Only a high-grade sealant can bridge that gap effectively.
5. Proper Ventilation to Stabilize Joint Temperature
The final way to stop joint seal failure is to stabilize the temperature of the roof deck. A ‘hot roof’ is a dying roof. If your roofing doesn’t have a balanced intake (soffit vents) and exhaust (ridge vents) system, the attic joint seals will be under constant stress from extreme heat during the summer and ice dams in the winter. Heat causes the wood to off-gas and shrink, which pulls at the fasteners and breaks the seals. By ensuring your attic stays within 10 degrees of the outside temperature, you reduce the ‘work’ the seals have to do. When roofing companies provide an estimate, check for a ventilation audit. If they aren’t looking at your soffits, they aren’t protecting your joints. Failing to vent properly leads to water entry at attic joint seals as the structural integrity of the sealants degrades under UV and thermal shock. Don’t let a contractor sell you a ‘lifetime’ shingle without fixing the airflow; it’s like putting a new engine in a car with a clogged radiator.
The Cost of Hesitation
If you see water, the damage has likely been happening for months. Water is the universal solvent; it will dissolve your drywall, rot your headers, and breed mold that your family shouldn’t be breathing. The ‘fast’ fix is rarely the right fix in this trade. You need a forensic approach that identifies the entry point, understands the physics of why the seal failed, and replaces the system with materials that can handle the brutal reality of our climate. When searching for local roofers, ask them about their flashing details and their underlayment laps. If they talk about ‘square footage’ and ‘shingle price’ but don’t mention ‘capillary breaks’ or ‘flashing reglets,’ keep looking. Your home deserves a roof that is engineered, not just nailed together.