The Forensic Autopsy of a Failed Valley
The call came in at 3:00 AM during a tropical downpour in Savannah. The homeowner sounded defeated—a steady drip-drip-drip was hitting their mahogany dining table. Walking on that roof the next morning felt like walking on a sponge; I knew exactly what I’d find underneath before I even pulled my hammer. The shingles looked fine from the ground, but the valley—the most high-traffic drainage point on any roof—was a disaster. The metal seam flashing had pulled loose, creating a 140-degree funnel for wind-driven rain to bypass the entire system. When a valley fails in a humid, high-wind climate, it’s not just a leak; it’s a slow-motion demolition of your home’s structural integrity. Local roofers often overlook these seams because they require precision, not just speed. If you have been searching for roofing companies to handle a mysterious leak, you are likely dealing with a valley that has succumbed to thermal expansion and poor fastening.
“A roof is only as good as its flashing.” – Old Roofer’s Adage
The Physics of Failure: Why Valleys Let Go
To understand the fix, you have to understand the failure. Roof valleys are the ‘Grand Canyons’ of your home’s exterior. During a heavy storm, thousands of gallons of water are concentrated into these narrow channels. In the Southeast, the intense heat causes metal flashing to expand during the day and contract at night. This constant movement eventually ‘backs out’ the fasteners. Once a nail (or a ‘shiner’ that missed the rafter) is loose, capillary action takes over. Water doesn’t just fall into the hole; surface tension pulls it sideways, dragging it under the flashing and directly onto the plywood decking. This leads to unforeseen wood rot that can compromise your entire roof deck before you ever see a spot on the ceiling. If the metal isn’t hemmed or the sealant has dried out from UV exposure, the wind will eventually catch the edge and peel it back like a sardine can.
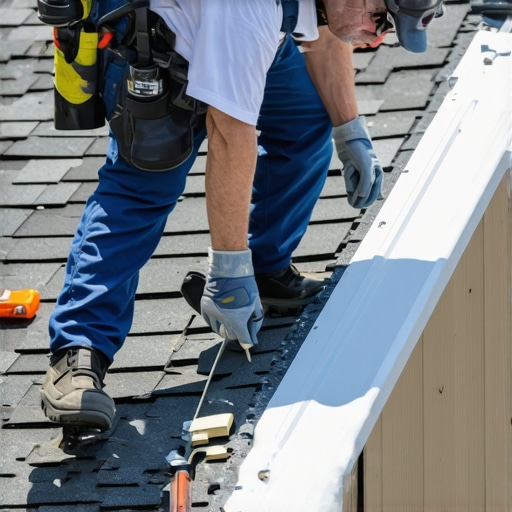
Fix 1: The Mechanical Fastener Reset (Avoiding the Shiner)
The first and most common fix involves resetting the mechanical bond of the valley metal. Many roofing crews use standard roofing nails that aren’t long enough to bite through the valley metal, the underlayment, and the old shingle layers into the wood. We replace these with high-quality stainless steel fasteners with neoprene washers. The key here is placement. You never nail into the center of a valley. You nail at the very edges, ensuring the fasteners are covered by the overlapping shingles. If a roofer leaves a ‘shiner’—a nail that misses the wood and hangs out in the open—it becomes a direct conduit for water. This is why it is often better to hire a specialist rather than a general crew; for more on this, check out 3 reasons to hire a specialist. Proper fastening prevents the ‘flapping’ sound you hear during high winds.
[image_placeholder_1]
Fix 2: High-Modulus Polyurethane Sealing
Forget the $5 tubes of silicone you find at big-box stores. In a high-heat, high-moisture environment, cheap caulk brittle-cracks in six months. We use high-modulus polyurethane sealants that remain flexible up to 300% of their original size. This fix involves cleaning out the old, dried-out ‘tar’ that some ‘trunk slammer’ contractor smeared in the valley and injecting the sealant into the seam itself. This creates a gasket-like seal that handles the thermal shock of a 100°F day followed by a 70°F rain shower. Without this flexibility, the seam will simply pull apart again during the next season. If you are doing a roof inspection, look for sealant that has turned chalky or started to peel away from the metal.
Fix 3: Hemming the Metal Edges
A ‘flat’ piece of valley metal is an invitation for water to travel horizontally. One of the best professional fixes is to ‘hem’ the edge of the flashing. By folding the outer half-inch of the metal back on itself, we create a literal wall that prevents water from being blown or sucked under the shingles. This is a trade secret that separates real roofing companies from the storm chasers. When water tries to move sideways via capillary action, it hits that hemmed edge and is forced back down the valley. It’s a simple mechanical fix that doesn’t rely on chemicals or adhesives, making it the most permanent solution for loose seams.
“Flashing shall be installed in a manner that prevents moisture from entering the wall and roof through joints in copings, through moisture-permeable materials and at intersections with parapet walls and other penetrations.” – International Residential Code (IRC) R903.2
Fix 4: Integrating Secondary Water Resistance (SWR)
If the valley flashing is loose, the underlayment beneath it is likely compromised as well. The fix isn’t just about the metal; it’s about what’s under it. We install a self-adhering modified bitumen membrane—often called Ice & Water Shield, though in the South we use it for its high-temp waterproof properties. This membrane ‘heals’ around any fasteners driven through it. When we reset the valley metal, we ensure this SWR layer extends at least 12 inches past the valley center on both sides. This ensures that even if a seam becomes slightly loose in the future, the water hits a secondary waterproof barrier rather than the plywood. If you ignore this, you’ll eventually deal with hidden decking plywood decay, which can lead to rafters sagging.
Fix 5: Installing a ‘Cricket’ or Diverter at Junctions
Sometimes a valley seam comes loose because there is too much hydrostatic pressure at a specific junction—like where a dormer meets the main roof slope. In these cases, we don’t just fix the seam; we change the flow of water. By installing a small ‘cricket’ (a peaked diverter), we split the water stream before it hits the vulnerable seam. This reduces the volume of water the flashing has to handle by 50% or more. This is forensic roofing at its best: identifying the physical cause of the stress and re-engineering the roof to handle it. Many homeowners think they need a full replacement when they just need better water management at their valleys.
The High Cost of the Quick Fix
I’ve seen too many people try to fix a loose valley with a bucket of roofing cement. They smear it on, it looks ‘sealed,’ and they go back inside. But that tar traps moisture against the metal, accelerating rust and preventing the metal from expanding. Within a year, the leak is back, and the damage is twice as bad. If you spot a loose seam early, the fix is a few hundred dollars in materials and labor. If you wait until the plywood feels like oatmeal, you’re looking at a five-figure ‘surgery’ to replace the deck and the surrounding squares of shingles. Don’t let a ‘cheap’ quote from local roofers fool you; if they aren’t talking about hemming, polyurethane, and underlayment integration, they aren’t fixing the problem—they’re just hiding it for the next guy to find.