The Anatomy of a Midnight Failure: When the Ceiling Starts Talking
It usually starts with a sound like a metronome—a steady, rhythmic tink-tink-tink against a plastic bucket while the wind howls outside at forty knots. You’re standing in your living room, staring at a brown ring forming on the ceiling, wondering how a structure designed to shed water is currently failing at its one job. As a forensic roofer with two decades of peeling back layers of gross incompetence, I can tell you that roofs don’t just fail; they are systematically dismantled by physics. My old foreman, a man who had more tar under his fingernails than blood in his veins, used to say, ‘Water is patient. It will wait for you to make a mistake.’ He was right. That leak isn’t just a hole; it’s a symptom of a larger mechanical breakdown in your home’s envelope.
The Southeast Reality: Why Wind-Driven Rain is Different
In our humid, coastal-influenced climate, we aren’t just fighting gravity; we are fighting atmospheric pressure. During a storm, wind hits the windward side of your house, creating a high-pressure zone. Meanwhile, the leeward side experiences a vacuum. This pressure differential literally sucks water uphill. I’ve seen moisture bypass a perfectly good valley because the wind shoved it through the tiny gap where the flashing meets the brick. This is the realm of capillary action, where water molecules use surface tension to crawl between two tight surfaces, like the underside of a shingle and the underlayment. If your local roofers didn’t account for this with a proper emergency roof services 4 steps for immediate leak storm patching plan, your attic is basically a giant sponge waiting to happen.
“Proper drainage is the primary defense against water infiltration; without it, even the most expensive materials will eventually succumb to hydrostatic pressure.” – NRCA Roofing Manual
Step 1: The Forensic Search (Finding the ‘Shiner’)
The first mistake homeowners make is thinking the leak is directly above the puddle. Gravity is rarely that kind. Water hits the plywood, travels down the rafter, hits a wire, and drips ten feet away from the entry point. You need to get into the attic—if it’s safe—and look for ‘shiners.’ A shiner is a nail that missed the rafter. In the dark, your flashlight will hit the moisture on that cold nail, making it glint. That nail is a thermal bridge; it’s the highway water uses to enter your home. If you see wood that looks like it’s been soaked in tea, you’ve found your culprit. This is where hidden decking plywood decay begins, turning your structural support into something with the structural integrity of wet cardboard.
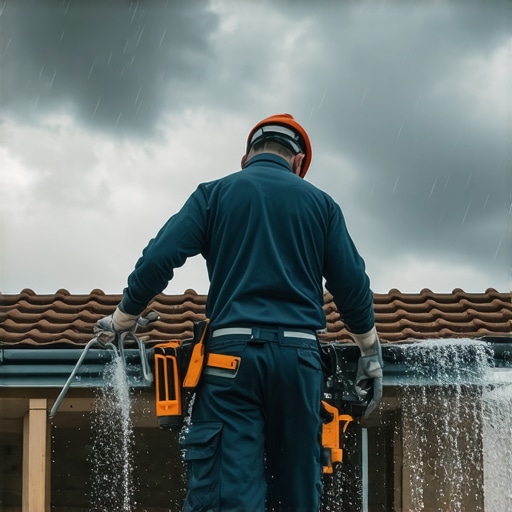
Step 2: The Triage Patch—Physics Over Luck
Once you’ve identified the entry point, you need a temporary stop-gap. Don’t just throw a tarp over the ridge and hope for the best. You have to understand ‘lapping.’ A tarp must go under the shingles above the leak and over the shingles below it. If you just nail a tarp down, you’ve created a hundreds of new holes for water to enter. Professional roofing companies use heavy-duty plastic and ‘lath strips’ to secure the edges. Never use a staple gun; staples have zero pull-out resistance in a high-wind event. You need the mechanical bond of a nail through a strip of wood to keep that patch from becoming a kite. If the leak is around a protrusion, check the loose roof valley seam flashing, as these are the most common failure points in rapid-onset storms.
Step 3: The Flashing Forensic and the ‘Cricket’ Strategy
If your leak is near the chimney, you’re likely looking at a lack of a cricket. A cricket is a small, peaked structure behind a chimney that diverts water to the sides. Without it, water builds up in a ‘dead valley,’ creating hydrostatic pressure that forces liquid under the flashing. Most ‘trunk slammers’ skip the cricket because it takes an extra hour to build. But in a tropical downpour, that hour is the difference between a dry house and a $10,000 mold remediation bill.
“A roof is only as good as its flashing.” – Old Roofer’s Adage
When you’re inspecting the damage, look for cracked mastic or rusted galvanized steel. In our salt-air environment, anything less than stainless steel or heavy-gauge copper is just a ticking clock.
Step 4: Vetting the Fix and Avoiding the Scam
After the storm passes, the ‘storm chasers’ will arrive with their shiny trucks and ‘free roof’ promises. Avoid them like the plague. You need local roofers who understand the specific uplift ratings required for our zone. When you get an estimate, it shouldn’t just say ‘replace roof.’ It should detail the squares (units of 100 square feet) of shingles, the type of underlayment, and the specific flashing plan for every penetration. Learn how to read a detailed estimate before you sign anything. If they don’t mention ‘drip edge’ or ‘ice and water shield’ in the valleys, they aren’t building a roof; they’re building a future leak. The goal isn’t just to stop the water today; it’s to ensure that when the next storm rolls in, you can actually sleep through the sound of the rain.