The Anatomy of a Midnight Leak: Why Your Living Room is Now a Lake
It’s 3:00 AM in the Gulf Coast, the wind is screaming at 60 miles per hour, and that steady drip-tap-drip against your hardwood floor is the sound of your bank account draining. As a veteran who’s spent three decades crawling through humid attics and investigating failed systems, I can tell you: water doesn’t just fall through a hole. It’s an infiltrator. In this tropical climate, the enemy isn’t just volume; it’s wind-driven rain that defies gravity. While most roofing companies will tell you that you just need a few new shingles, a forensic look usually reveals a much uglier truth. My old foreman, a crusty guy named Miller who survived more hurricanes than most meteorologists, used to tell me, ‘Water is patient, kid. It will wait years for you to miss one nail, and then it’ll rot your house from the inside out while you’re sleeping.’
“A roof is only as good as its flashing.” – Old Roofer’s Adage
When you’re dealing with an active leak, you aren’t just fighting a puddle; you’re fighting hydrostatic pressure. In the Southeast, the heat can reach 140°F in the attic, causing the wood to expand and contract like a breathing lung. This movement breaks the seal on your local roofers’ work if they didn’t account for thermal expansion. When the storm hits, that water gets pulled under the shingle laps through capillary action—essentially, the water ‘climbs’ uphill because the gap is so tight it creates a vacuum. If your underlayment is shredded, you’re in for a world of hurt. You need to understand signs of poor underlayment before the next storm arrives, because by the time the ceiling sags, the damage is already structural.
Step 1: The Forensic Triage—Locating the Breach
Finding the leak source during a storm is like trying to find a specific needle in a stack of needles while someone throws buckets of water at you. You might see a drip over the dining table, but the actual entry point is likely fifteen feet ‘up-slope’ or at a transition like a chimney or a valley. Water travels along the rafters, following the path of least resistance until it finds a shiner—a nail that missed the joist and provides a perfect cold-bridge for condensation to follow. If you have a steep pitch, the water might even be jumping across the 1×6 lath boards before it ever hits the drywall. This is why immediate tarping is the only sane first step. You have to kill the source at the ridge before you can even think about the ceiling.
Step 2: Managing the Surge and Preventing Secondary Saturation
Once you’ve identified the general area, you have to mitigate the moisture already inside the envelope. In our humid climate, a wet roof deck is a petri dish for mold. If the water has reached the insulation, it’s no longer just a roofing issue; it’s an air quality disaster. If you see the ceiling bulging, don’t wait for it to burst. Take a small screwdriver and poke a hole in the center of the sag to drain the water into a bucket. This relieves the weight on the gypsum board and might prevent the whole ceiling from collapsing. You also need to look for signs of moisture trapped in insulation, as fiberglass acts like a giant sponge that will never dry out on its own in the Florida humidity.
“The roof covering shall be installed in accordance with the manufacturer’s installation instructions.” – International Residential Code (IRC) R905.1
Step 3: The Temporary Seal—Physics Over Aesthetics
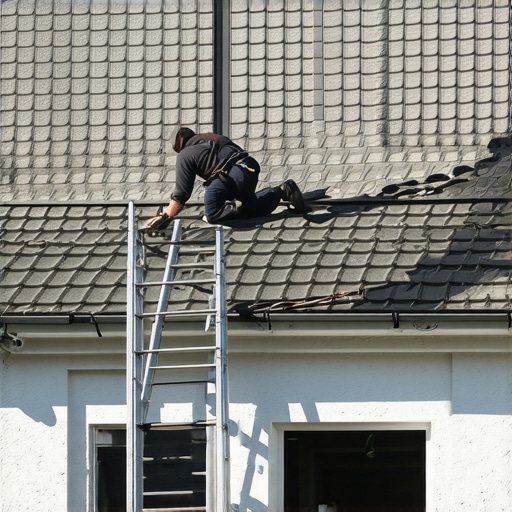
If you can safely get on the roof (and I don’t recommend this for homeowners during a gale), you’re looking for the ‘smoking gun.’ Often, it’s a failed pipe boot or a cricket that wasn’t flashed properly. In the desert, UV kills shingles; here, it’s the salt air and wind uplift. If a shingle is lifted, the seal is broken forever. You can’t just press it back down and hope. You’ll need a plastic roof cement—the thick, nasty stuff that smells like a tar pit—to create a temporary dam. Apply it to the underside of the shingle and the decking. However, be warned: this is a Band-Aid, not surgery. If the valley is the problem, you might be dealing with loose valley seam flashing, which requires a much more technical approach than a squeeze tube of caulk.
Step 4: Evaluating the Integrity of the Entire Square
After the rain stops, the real work begins. You need to count the squares of damage and determine if the system is compromised. A ‘cheap’ roofer will offer to patch the hole, but a forensic inspector looks at the granules. If your shingles are balding and the fiberglass mat is showing, the entire system has reached its ‘terminal velocity.’ In our region, wind codes are strict for a reason. If your local roofers didn’t use stainless nails or a secondary water resistance layer, you’re basically living under a ticking time bomb. This is the moment you need to evaluate if a simple fix is throwing good money after bad. Often, the hidden rot in the plywood is so extensive that a full tear-off is the only way to ensure your family stays dry during the next hurricane season.
The High Cost of the ‘Trunk Slammer’ Special
I see it every year: homeowners hire roofing companies that show up with a ladder and a bucket of mastic, charge a thousand bucks, and disappear. Three months later, the leak is back, and the plywood is now the consistency of wet cardboard. Don’t fall for the ‘Lifetime Warranty’ marketing fluff. Those warranties rarely cover the labor or the ‘acts of God’ like our coastal storms. You need an ironclad contract and a crew that knows how to handle 2026-standard safety and material protocols. If you wait, the ‘minor leak’ will become a structural failure of the rafters. Water is patient. Are you? Stop the drip before it becomes a flood. Your home is a system, and the roof is the most over-taxed part of it. Treat it with the respect a 25-year veteran knows it demands.