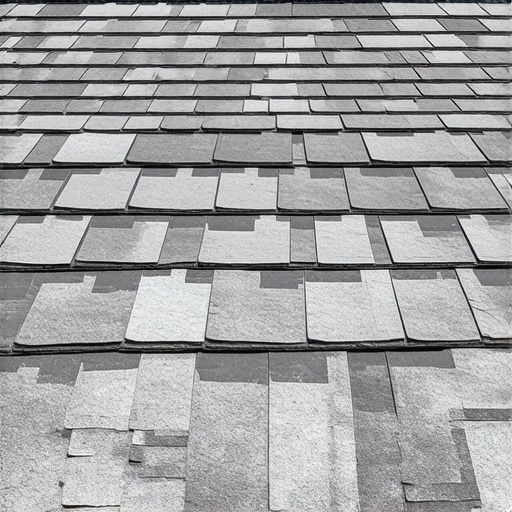
The Anatomy of a Dying Roof: Why Your Shingles Look Like Potato Chips
You’re standing in your driveway, looking up at your roof as the sun hits it at an angle, and you see it. The edges of your shingles aren’t flat anymore. They’re lifting, twisting, and turning upward like a bag of cheap potato chips left out in the sun. As a forensic roofer with twenty-five years of grime under my fingernails, I can tell you that those curled edges aren’t just an eyesore—they are the white flag of surrender. Your roof is dying, and it’s usually because someone cut a corner ten years ago. My old foreman used to say, ‘Water is patient. It will wait for you to make a mistake.’ He was right, but he forgot to mention that heat is just as calculated. In the cold, biting winters of the North, where we deal with massive thermal bridging and attic bypasses, shingle curling is the final stage of a long, invisible war between your HVAC system and the elements.
1. The ‘Cupping’ Diagnostic: Looking for Concave Failure
When most local roofers talk about curling, they are actually seeing one of two distinct physical failures. The first is ‘cupping.’ This happens when the perimeter of the shingle stays relatively fixed, but the center of the tab shrinks or the edges rise, creating a concave shape. From a forensic perspective, this is often a manufacturing issue or a sign of extreme age. Asphalt shingles are a sandwich of fiberglass mat, bitumen (asphalt), and crushed stone granules. When that bitumen dries out—a process called volitilization—the shingle loses its flexibility. In cold climates, the shingle becomes brittle. When the sun hits it, the top layer expands while the bottom stays cool against the deck. This differential expansion pulls the edges up. If you see this, your shingles are no longer shedding water; they are actually catching it. This allows water to move sideways through capillary action, eventually finding a shiner (a nail missed into the rafter) and traveling straight into your insulation. If you catch this early, you might save the deck, but usually, it’s a sign you need a full square count for a replacement.
“Proper attic ventilation is not merely a recommendation; it is a fundamental requirement to prevent the premature distortion of asphaltic materials.” – National Roofing Contractors Association (NRCA)
2. ‘Clawing’ and the Pressure from Below
The opposite of cupping is ‘clawing.’ This is when the center of the shingle humps up and the edges dig down into the roof. While cupping is often about the shingle drying out, clawing is almost always a symptom of a ‘baked’ attic. When roofing companies fail to install adequate intake and exhaust ventilation, your attic becomes a pressurized oven. On a 90-degree day, your attic can hit 140 degrees. That heat radiates upward, cooking the underside of the shingle. At the same time, moisture from your bathroom or kitchen—thanks to a disconnected vent or a poor seal—gets trapped against the plywood. This moisture forces the fiberglass mat to swell. Because the shingle is nailed down tight, it has nowhere to go but up in the middle. If you ignore this, you’re looking at hidden plywood rot that will make the roof feel like a sponge when you finally walk on it.
3. The ‘Fishmouth’ at the Ridge
Ever see a shingle that looks like a literal open mouth? We call those fishmouths. They usually happen at the laps or near the ridge. This isn’t just curling; it’s a structural failure of the shingle’s seal strip. In the North, ice dams are the primary catalyst here. Water freezes under the shingle, expands, and breaks the thermal bond of the sealant. Once that bond is broken, the wind gets underneath and starts the curling process. This is why we preach about the importance of attic draft issues and proper air sealing. If the heat from your house is escaping into the attic, it’s melting the snow on the roof, which then refreezes at the cold eaves, creating a dam that pushes water under your shingles. Once that shingle curls, it becomes a sail. The next windstorm will strip that section of the roof bare, leaving your local roofers to deal with an emergency repair that could have been avoided with a few cans of spray foam in the attic.
4. Granule Loss and the UV Exposure Cycle
Curling is rarely a solo act; it usually brings its friend, granule loss, along for the ride. The crushed stone on your shingles isn’t there for looks—it’s the UV sunscreen for the asphalt. When a shingle begins to curl, it exposes the un-granulated edges and the underside of the lap to direct sunlight. This leads to rapid degradation. You’ll start to see ‘bald spots’ and find what looks like coffee grounds in your gutters. This is the asphalt literally disintegrating. Once the fiberglass mat is exposed, it becomes porous. Roofing at this stage is no longer about aesthetics; it’s about preventing a catastrophic leak. If you see curling combined with heavy granule accumulation in your downspouts, the protective ‘envelope’ of your home has been breached. You should check for early shingle curling reasons to see if your warranty might cover it, though most ‘lifetime’ warranties are riddled with loopholes regarding ventilation.
“The building shall be provided with a roof covering designed, fabricated and installed in accordance with this code and the applicable standards.” – International Residential Code (IRC) R901.1
5. The Impact of Poor Underlayment
Sometimes the curling isn’t the shingle’s fault at all—it’s the ‘cheap’ paper underneath. Old-school organic felt paper absorbs moisture. If the roofing companies you hired used a low-grade felt instead of a modern synthetic, that paper can wrinkle and ‘telegraph’ those wrinkles through the shingles. This creates a curling effect that looks like the roof is heaving. Forensic investigation often reveals that the moisture was trapped between the felt and the shingle during a morning dew installation. In our climate, you need a breathable underlayment or a high-quality synthetic that won’t hold water. If the underlayment is failing, the shingles have no flat surface to sit on. You’ll often see this near the valley or around a cricket where water flow is highest. If the base is compromised, the top layer doesn’t stand a chance. Make sure your contractor isn’t skipping the details of sealing attic ridge vents, as that’s often where the moisture buildup starts.
The Fix: Band-Aids vs. Surgery
If you have three shingles curling on a twenty-year-old roof, you might be tempted to just glue them down with a tube of plastic cement. That’s a band-aid on a gunshot wound. The curling is a symptom of a systemic failure—either age, heat, or moisture. Trying to flatten a curled, brittle shingle usually results in it snapping like a cracker. The real fix involves a ‘forensic’ approach: checking the attic insulation levels, ensuring the soffit vents aren’t blocked by blown-in cellulose, and verifying that your ridge vent is actually cut open. If the deck is wavy, you’re likely looking at hidden decking decay that requires a full tear-off. Don’t let a ‘trunk slammer’ tell you they can just roof over the old layer. Adding a second layer of shingles only traps more heat, accelerating the curling of the new shingles and voiding every warranty in the book. Do it once, do it right, and keep the water where it belongs—outside.