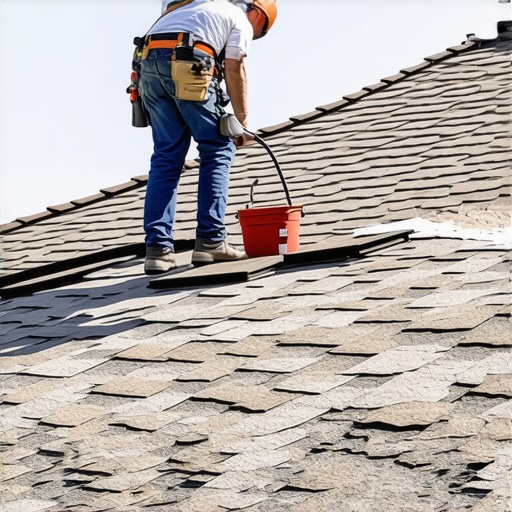
The Forensics of a Failing Roof
Walking on that roof felt like navigating a marsh. Every step I took on the north-facing slope sent a squish through my boots, a sensation that tells a veteran investigator everything they need to know before the first shingle is even lifted. It hadn’t rained in forty-eight hours, yet the plywood deck was holding onto moisture like a soaked sponge. This wasn’t a product failure; it was a human one. The local roofers who installed this mess three years ago skipped the basics of thermodynamics and moisture management. If you are looking at roofing companies for your 2026 project, you aren’t just buying shingles; you are buying a system that must survive the physics of your climate. Here is how to spot the ‘trunk slammers’ before they cost you twenty grand.
1. The ‘Labor Broker’ Shell Game
One of the biggest red flags in the modern industry is the disconnection between the salesman and the crew. You meet a polished guy in a branded truck, but when the roofing project starts, a generic white van shows up with a crew that doesn’t work for the company. These are labor brokers. They get paid by the square—that is, a 100-square-foot area—and their goal is speed, not precision. When a crew is rushing to beat the clock, they miss the ‘shiners.’ A shiner is a nail that misses the rafter or the structural decking entirely, sticking through the underside of the roof into the attic. In the winter, these cold metal nails act as condensers. Warm air from your house hits that cold metal, turns into frost, and then drips back down into your insulation. Over five years, that’s enough water to rot out a structural member. If the company cannot guarantee a dedicated, W-2 crew with a foreman who has been there for years, walk away.
2. The Myth of the ‘Lifetime’ Warranty
In 2026, every contractor will promise a ‘Lifetime’ warranty. It is a marketing term, not a technical one. Most of these warranties only cover the material, not the labor to replace it. Even worse, they are often voided the moment the installation deviates from the manufacturer’s technical manual. Let’s talk about starter strips. A cheap contractor will use a cut-up three-tab shingle as a starter. While it looks okay from the ground, it lacks the specialized adhesive strip required to lock down the first course of shingles against high winds. When the first storm hits, the wind catches that bottom edge, creates uplift, and peels the roof back like a sardine can.
“Roofing systems shall be installed in accordance with the manufacturer’s published installation instructions.” – International Residential Code (IRC) R905.1
If they don’t mention using the specific starter and ridge components from the same manufacturer, they are cutting corners on your dime.
3. Ignoring the Physics of Ventilation and Thermal Bridging
A roof is a breathing skin. In cold climates, the biggest enemy isn’t the snow; it’s the heat escaping your living room. If your local roofers don’t inspect your attic, they aren’t doing their job. Without proper intake at the soffit and exhaust at the ridge, you get ‘Attic Bypasses.’ This is where warm, moist air is trapped against the roof deck. Through capillary action, moisture can actually move sideways under a shingle if the pitch is too low or the ventilation is stalled. The water doesn’t wait for a hole; it finds a temperature differential. A foreman who doesn’t talk about R-values and baffles is just a shingle-slapper. They will leave you with ice dams—those heavy ridges of ice that form at the eaves, forcing water back up under the shingles through hydrostatic pressure. No amount of ‘Ice & Water Shield’ will save a roof that is being cooked from the inside out by a poorly ventilated attic.
4. The ‘Flash and Dash’ Approach
Flashing is the most technical part of the job, and it’s where 80% of leaks originate. I’ve seen roofing companies reuse old, corroded step flashing because it was ‘still good.’ It never is. Step flashing involves individual L-shaped pieces of metal woven into each course of shingles where they meet a wall or chimney. If a contractor says they will just ‘caulk it,’ they are lying to you. Caulk is a maintenance item with a five-year lifespan; a roof should last thirty. They should be talking about ‘counter-flashing,’ where they grind a reglet into the brick of your chimney to tuck the metal in, ensuring a mechanical seal that doesn’t rely on a bead of goo.
“A roof is only as good as its flashing.” – Old Roofer’s Adage
Without new, high-quality metal at every valley and penetration, you are just waiting for a structural failure.
5. The Undervalued Drip Edge
Look at your current roof. Is there a piece of T-shaped metal tucked under the first row of shingles? That is the drip edge. Its job is to move water away from the fascia board and into the gutter. Many ‘budget’ local roofers omit this or install it over the underlayment instead of under it at the eaves. This leads to water wicking back into the wooden fascia and the ends of the rafters. Within a decade, the wood starts to look like wet mulch. You won’t see the damage until the gutters literally fall off the house because the wood behind them has turned to dust. A professional estimate will always include a heavy-gauge aluminum or steel drip edge to break the surface tension of the water and protect the ‘bones’ of the house. Don’t sign anything that doesn’t explicitly list ‘new drip edge’ as a line item. If they are willing to skip a fifty-cent piece of metal, imagine what else they are hiding under those shingles.
The Forensic Verdict
Don’t be swayed by the lowest bid. Roofing is a game of invisible details. A contractor who explains the ‘why’ of the cricket—that small peak behind a chimney to divert water—is a contractor who understands that water is a patient predator. It will find the one nail your crew missed, the one piece of old flashing you reused, or the one vent you didn’t install. In 2026, your best defense is a contractor who treats your home like a forensic puzzle, ensuring every layer, from the deck to the ridge cap, is built to fight the laws of physics.
This detailed breakdown of common roofing pitfalls really highlights the importance of knowing what to look for before hiring a contractor. I had a similar experience with a previous roof replacement where I didn’t pay enough attention to the quality of flashing and ventilation. Within just a few years, I faced leaks and ice dams, which could have been avoided with better installation practices. It’s impressive how much of a difference proper flashing and drip edges can make in the long run. I especially appreciate the emphasis on labor transparency and the need to verify the use of manufacturer-specific components—cutting corners on these details can be costly later. Has anyone found that asking for references or inspecting their recent work helps weed out the ‘trunk slammers’? I’d be curious to hear what questions others have asked or steps they take during the vetting process to ensure they’re hiring a trustworthy, detail-oriented roofer.
This article really emphasizes how the little details in roofing can become big problems if overlooked. I remember my last roof replacement, where I insisted on seeing a breakdown of all the materials used and the actual work crew. It was eye-opening to see how much happens behind the scenes—like confirming the use of manufacturer-specific starter strips or ensuring proper venting and thermal barriers. I’ve noticed that many homeowners focus mainly on the shingles and overlook these essentials until it’s too late. One thing I found valuable was asking for references and inspecting recent completed projects, which helped me avoid the ‘trunk slammers’ so to speak. Has anyone else tried to verify their roofer’s work beforehand? What specific questions did you ask or signs did you look for to gauge their professionalism? I’d love to hear more about your experiences or tips on vetting a roofing contractor effectively.
This post really hits home with the importance of understanding every detail, especially when it comes to things like flashing and ventilation. I had a situation where a contractor reused old step flashing, leading to leaks that took years to fully diagnose and fix. The detail about the ‘cricket’ behind the chimney stood out to me—small design elements like that can make a surprisingly big difference over time. One aspect I’ve noticed, though, is that many homeowners don’t realize the significance of a proper drip edge until they see water damage or gutter issues firsthand. Do others here have tips on how to verify if a roofer properly installs these vital components during the project? Personally, I always ask if they follow the manufacturer’s ‘installation manual’ step-by-step, but I’d love to hear other verification methods that help ensure quality work upfront.