How to Trace a ‘Ghost’ Roof Leak Back to the Source Before it Rots Your Attic
Finding a puddle on your living room floor is stressful, but looking up at the ceiling and seeing nothing but dry drywall is baffling. This is the hallmark of a “ghost leak.” For homeowners, few things are as frustrating as knowing water is entering your home but being unable to find the entry point. The reality is that water rarely travels in a straight line; it follows the path of least resistance, often entering at one point and traveling feet – or even yards – along rafters or underlayment before manifesting as a visible drip. How to detect a roof leak on your home requires more than just looking at the ceiling; it requires a deep understanding of attic forensics.
Josue Pena, a leading expert in roof inspections and preventive maintenance, has spent years identifying these “silent killers” of structural integrity. According to data from DryHome, “silent leaks” can quickly escalate into $10,000 structural problems if left unchecked. By the time you see a stain, the wood underneath may have been rotting for months. Tracing these leaks back to their source is essential to protecting your home’s value and your family’s safety.
Why Roof Leaks Are Rarely Where You Think They Are
The physics of water movement is the primary reason why “ghost leaks” are so deceptive. When water penetrates the outer layer of your roof – whether through a cracked shingle or a failing piece of flashing – it doesn’t always drop straight down onto the attic floor. Instead, it interacts with the various layers of your roofing system through two primary forces: surface tension and gravity.
Surface tension allows water to “cling” to surfaces. If water enters near the ridge of your roof, it may run down the underside of the roof decking or follow the slope of a rafter for ten or fifteen feet before it hits a joint, a nail, or a knot in the wood that causes it to finally drip. This means a leak appearing over your bedroom might actually be originating from a chimney or vent several yards away. This phenomenon is why you might find that your roof decking might be rotting even without a visible leak inside your living space.
Furthermore, capillary action can pull water “uphill” or sideways through tight spaces, such as between overlapping shingles or under flashing. This is common in areas where debris, like pine needles or leaves, has accumulated, creating a “dam” that forces water into places it was never intended to go. Understanding that the source is almost always “up-slope” from the manifestation is the first rule of professional leak detection.
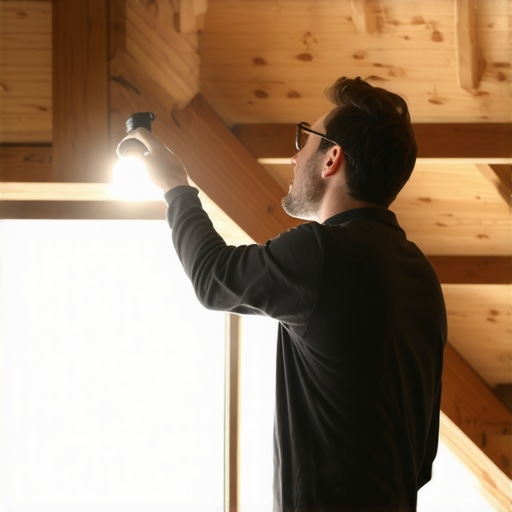
The Attic Inspection: Your First Line of Defense
To effectively learn how to detect a roof leak on your home, you must be willing to go where the evidence is: the attic. The best time to do this is during a heavy rainstorm or immediately after one. Safety is paramount here; always wear a mask to avoid inhaling insulation fibers and only step on the wooden joists, never the drywall ceiling, which cannot support your weight.
Once inside, use a powerful flashlight to scan the underside of the roof deck. Look for these specific forensic signs identified by industry leaders like FL Roof Advisors:
- Damp or Compressed Insulation: Water often saturates fiberglass or cellulose insulation before it ever reaches the drywall. Look for “valleys” or matted areas in the insulation.
- Dark or Rust-Colored Stains: As water travels along rafters, it picks up tannins from the wood or rust from nails, leaving telltale streaks that point back to the source.
- Musty Odors or Visible Mold: If you smell earthiness or see black/white spotting on the wood, you have a chronic moisture issue.
- “Shiners”: These are nails that missed the rafter during construction. In winter, moisture from the house condenses on these cold nails, forming frost. When the attic warms up, the frost melts, creating a “ghost leak” that only happens on sunny winter days.
If you notice that your rafters are showing signs of structural distress during your inspection, you should consult guides on emergency roof services and what to do if attic rafters sag. Catching these signs early can prevent a full roof collapse.
Step-by-Step: The “Hose Test” for DIY Leak Detection
If the weather is dry but you suspect a leak, you can simulate a rainstorm using a garden hose. This requires a two-person protocol: one person stays in the attic with a flashlight and a way to communicate (like a cell phone), and the other goes onto the roof.
- Start Low: Begin at the bottom of the roof slope. If you start at the top, water running down will mask the exact entry point.
- Isolate Zones: Spend at least 5 to 10 minutes soaking a specific area – such as a single vent or a section of a valley – before moving up.
- Focus on Penetrations: Direct the water around the base of chimneys, plumbing boots, and dormer walls.
- Wait for the Drip: The person in the attic must watch closely. Because water travels slowly through the layers of the roof, there may be a significant delay between the hose hitting the spot and the water appearing inside.
While the hose test is effective, climbing onto a roof can be extremely dangerous, especially if the roof is steep or wet. If you are uncomfortable with heights or the DIY method isn’t yielding results, it is time to call in local experts.
Common Culprits: Where Ghost Leaks Usually Hide
Experience shows that most “ghost leaks” originate from a handful of vulnerable areas. When looking for professional roof repair services, these are the areas a technician will likely inspect first:
Roof Valleys
Valleys are where two roof planes meet. They handle a massive volume of water runoff. If debris like leaves or branches builds up in the valley, it creates a dam. Water then backs up under the shingles, often bypassing the underlayment and entering the roof deck directly.
Plumbing Vent Boots
These are the pipes that stick out of your roof. They are usually sealed with a rubber “boot.” Over time, UV rays from the sun cause the rubber to crack or rot. Water enters through the gap between the pipe and the boot and typically runs straight down the outside of the pipe, eventually dripping onto the ceiling of a bathroom or kitchen. For more on this, check out 5 ways to stop water entry at pipes.
Step Flashing and Sidewalls
Where a roof meets a vertical wall (like a dormer or a second story), “step flashing” is used. If these metal pieces are rusted, missing, or improperly installed, water can seep behind the siding and into the wall cavity. This type of leak often manifests as a stain on a wall rather than a ceiling.
Chimney Mortar and Shoulders
Chimneys are notorious for leaks. According to the National Roofing Contractors Association (NRCA), the intersection of masonry and roofing material is one of the most common failure points. Decay in the mortar allows water to seep behind the brickwork, where it can travel down the chimney structure and emerge far from the roofline.
Advanced Detection: Why Professionals Use Thermal Imaging
Sometimes, even the most diligent attic inspection and hose test fail to find the source. This is where advanced technology comes into play. Specialists like Josue Pena utilize infrared (thermal imaging) cameras to detect moisture that is invisible to the naked eye.
Thermal imaging works on the principle of evaporative cooling. Wet materials retain heat differently than dry ones. In the evening, as the roof cools down, wet insulation or wood will hold onto heat longer (or appear cooler due to evaporation, depending on the conditions). An infrared scan can reveal a “map” of moisture beneath the shingles, showing exactly where the water is entering and the path it is taking through your home’s structure. This is a primary reason why local roofers now use thermal scans for 2026 quotes and diagnostic reports.
By using these tools, professionals can provide a definitive answer without having to tear up large sections of your roof to “guess” where the leak might be. It transforms leak detection from a game of trial and error into a precise science.
Conclusion: Stopping the Rot Before It Starts
A “ghost leak” is more than just a nuisance; it is a ticking clock. Every time it rains, the structural components of your home – the rafters, the decking, and the joists – are being compromised. Moisture also invites mold growth, which can impact the air quality of your entire home. The U.S. Department of Energy notes that wet insulation loses its R-value significantly, leading to higher energy bills in addition to repair costs.
Proactive maintenance is the only way to ensure a small leak doesn’t become a total roof replacement. If you have noticed a musty smell, a mysterious stain, or dampness in your attic, don’t wait for the ceiling to cave in. Tracing the source requires patience, technical knowledge, and the right tools. If your DIY efforts haven’t solved the mystery, it is time to seek Peak to Peak Roofing and Exteriors for expert roof repair solutions. A professional inspection today can save you thousands of dollars and provide the peace of mind that your home is truly protected from the elements.