The Invisible Mechanics of a Leaky Roof
Walking through an attic in the middle of a New England winter is a sensory experience I wouldn’t wish on anyone. It is not just the cold; it is the smell. It is that heavy, cloying scent of damp wood and fiberglass insulation that has been saturated one drop at a time for months. Most homeowners think a leak is a sudden event, a catastrophic failure during a thunderstorm. But as a forensic roofer with twenty-five years on the deck, I can tell you that the real killers are the silent ones. They are the result of poor geometry and a lack of respect for the physics of water. My old foreman used to say, ‘Water is patient. It will wait for you to make a mistake.’ He was right. If your roofer messed up the shingle pattern, they didn’t just make an aesthetic error; they built a highway for moisture to enter your home.
“Proper shingle alignment and fastener placement are the primary defenses against wind-driven rain penetration.” – NRCA Manual
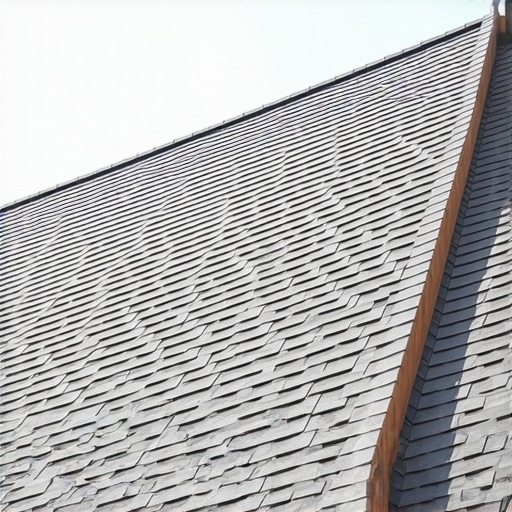
In the world of residential roofing, the way shingles are laid out—the pattern—determines the roof’s ability to shed water. When you look up at a roof from the curb, you see a uniform field of color. When I look up, I see a grid of potential failure points. In cold climates like ours, where ice dams are a constant threat, the shingle pattern is your last line of defense. If the offsets are wrong, the hydrostatic pressure of melting ice will find the gaps. You might be dealing with shingle buckling before you even realize the pattern was the culprit. This isn’t just about looking pretty; it’s about structural survival.
Tip 1: The 6-Inch Offset and the Death of ‘Racking’
One of the most common sins I see in modern roofing is ‘racking.’ This is a technique where local roofers install shingles straight up the roof in a vertical column. It’s fast, sure, but it’s a recipe for disaster. When you rack shingles, you create a series of vertical seams that are only protected by a single layer of asphalt. The industry standard—and the only way I’ll let a crew work on a house—is the stair-step method. This involves a horizontal offset, usually around six inches, which ensures that no two joints are anywhere near each other. Mechanism zooming reveals why this matters: water doesn’t just flow down; it moves sideways through capillary action. When a shingle is properly offset, that water has to travel six inches horizontally across a solid piece of asphalt before it hits another seam. If that offset is only two inches, the water finds its way to the underlayment in minutes. When this fails, you start seeing hidden decking plywood decay that rots your house from the outside in. Don’t let a contractor tell you racking is fine because it’s faster; it’s a shortcut that ends in a premature tear-off.
Tip 2: Fastener Placement and the ‘Shiner’ Problem
You can have the most expensive architectural shingles on the market, but if the nails are in the wrong spot, you have a 50-pound paperweight on your roof. Every shingle has a ‘nail line’—a narrow strip where the fastener is supposed to go to catch the layer underneath. If the roofer is moving too fast with their pneumatic gun, they start hitting ‘shiners.’ A shiner is a nail that missed the structural member or is exposed between the tabs of the shingle pattern. In our climate, these nails become thermal bridges. The heat from your attic hits the cold nail head, condensation forms, and it starts dripping onto your ceiling. It looks like a roof leak, but it’s actually a physics leak caused by bad patterning. Fasteners must be driven flush, never over-driven to cut the mat, and never under-driven to hold the shingle up. If you’re concerned about how your current roof was installed, checking for proper pattern alignment is the first step in a forensic audit.
“Fasteners for asphalt shingles shall be long enough to penetrate through the roofing materials and not less than 1/8 inch into the roof sheathing.” – International Residential Code (IRC) R905.2.5
When the nails are too high, the shingle can’t resist wind uplift. When they are too low, they are exposed to the elements. This is why roofing companies that hire inexperienced ‘trunk slammers’ are so dangerous; they don’t understand that a half-inch of deviation in a nail can lead to a total system failure during a winter gale. I’ve seen entire squares of shingles fly off a house because the nails were high-pinned above the double-layer common bond. It’s a preventable tragedy that costs homeowners thousands.
Tip 3: The Starter Course—The Foundation of the Pattern
Everything starts at the eave. The starter course is a specialized shingle strip that goes down before the first visible row. Its job is to provide a sealant bond at the very edge of the roof and to cover the gaps between the first row of shingles. I’ve lost count of how many times I’ve seen ‘pros’ just flip a standard shingle upside down and call it a starter. That doesn’t work. A real starter course has a factory-applied adhesive strip at the bottom edge. This strip is what prevents the wind from getting under your shingles and peeling them back like an orange. If the starter isn’t aligned perfectly with the first course, the entire pattern will be skewed as it moves toward the ridge. This creates ‘creeping’ joints that eventually align vertically, creating those highways for water I mentioned earlier. Using self-adhering shingles or dedicated starter strips is the only way to ensure the perimeter is locked down. Without this, you’ll be calling for emergency repairs after the first Nor’easter of the season.
The Warranty Trap: Why Patterns Matter for Your Wallet
People love to brag about their ‘Lifetime Warranty.’ Let me give you a reality check: those warranties are almost always voided by improper installation. If a manufacturer sends an inspector out and sees that your shingles were racked or that your offsets are only four inches instead of the required six, they will deny your claim faster than you can hang up the phone. They know that the pattern is the structural integrity of the product. When you hire local roofers, you need to verify they are following the specific application instructions printed on every single bundle of shingles. Don’t just trust them; ask to see the ‘stair-step’ they are building. If they look at you like you have three heads, find another crew. You also need to ensure they have valid insurance before they set foot on a ladder, because a fall caused by a slipping shingle (due to bad nailing) is a legal nightmare you don’t want.
The Cost of Waiting for the Leak
If you suspect your shingle pattern is off, don’t wait for the water to hit your dining room table. By the time you see a brown spot on the drywall, the plywood deck has likely been wet for months. It starts as a small fungal growth, then it turns the wood into something the consistency of oatmeal. I’ve walked on roofs that felt like trampolines because the decking was so far gone. This often happens around valleys and joint seals. If you can catch it early, you can sometimes perform ‘surgery’—replacing a section and flashing it properly—rather than a full ‘amputation’ of the roof. Pay attention to water entry at attic joint seals to stop the rot before it spreads. Roofing isn’t just about shingles; it’s about a complete system of ventilation, insulation, and geometry working in harmony to keep the outside, out. Respect the pattern, and your roof will respect you. Ignore it, and water will eventually find its way home.