The Anatomy of a Midnight Drip: Why Your Attic Joints are Failing
You hear it before you see it. That rhythmic, hollow thwap against the drywall ceiling of your master bedroom at 3:00 AM. By the time you get the bucket, the damage is already doing its slow, destructive dance through your insulation. As someone who has spent over two decades climbing ladders and peeling back the lies told by cheap roofing companies, I can tell you that water doesn’t just ‘fall’ into your house. It hunts for a way in. In the humid, rain-lashed environments of the Southeast, water is a persistent predator. It uses wind-driven pressure to find the tiniest gap in your defenses, often at the joints where different planes of your roof meet.
“A roof is only as good as its flashing.” – Old Roofer’s Adage
My old foreman used to say, ‘Water is patient. It will wait for you to make a mistake.’ He was right. Most local roofers can slap a shingle down in a straight line, but they fail when it comes to the complex geometry of an attic joint. They rely on a ‘lick and a promise’—a bead of cheap silicone that cracks under the brutal UV radiation within two seasons. When that seal fails, the physics of capillary action take over. Water gets sucked uphill, moving sideways under shingles and eventually saturating your plywood. Once you have hidden decking plywood decay, the structural integrity of your home is on the clock. Here are five forensic-level methods to stop water entry at those critical attic joints before the rot sets in.
1. Mechanical Diversion with Custom Crickets
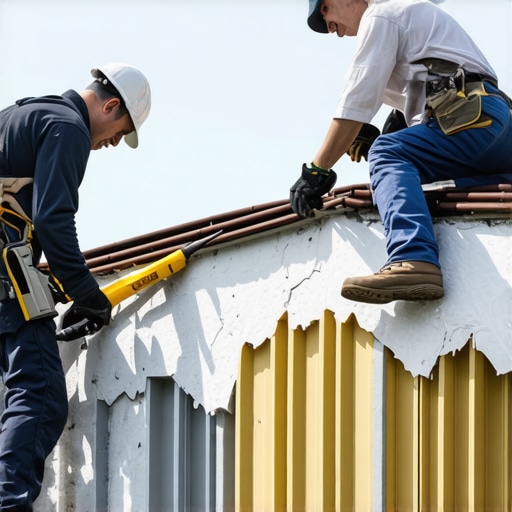
The biggest mistake in roofing is trying to block water rather than move it. At the junction where a steep roof slope meets a vertical wall or a large chimney, water pools. This creates hydrostatic pressure. To fight this, we use a cricket—a small, peaked structure built behind the obstacle to divert water to the sides. Without a cricket, you’re just building a dam. I’ve seen squares of roof completely ruined because a contractor thought ‘extra caulk’ was a substitute for proper framing. If your roofer doesn’t mention a cricket for a wide chimney, fire them. You need local specialists who understand the volume of water a tropical downpour can dump into a single valley in minutes.
2. Step-Flashing and the ‘Shingle Effect’
Water entry at attic joints is frequently caused by ‘shiners’—missed nails that provide a direct conduit for water to travel from the shingle surface into the rafter. But even more common is the lack of proper step-flashing. Each piece of metal flashing must be woven into the shingle courses. I recently investigated a leak in a five-year-old home where the installer used one long piece of ‘L’ metal. The thermal expansion of the metal tore the sealant apart within months. You need individual steps that allow for the house to breathe and move. According to the International Residential Code (IRC) R903.2:
“Flashing shall be installed in such a manner so as to prevent moisture from entering the wall and roof through joints in copings, through moisture-permeable materials and at intersections of roof planes.” – IRC Section R903.2
3. High-Solids Polyether Sealants vs. Cheap Silicone
If you see your roofer reaching for a tube of $5 clear silicone from a big-box store, run. For attic joint seals, we use high-solids polyether sealants. These are ‘moisture-cure’ products, meaning they actually get stronger in the humid conditions that cause other products to peel. These sealants remain flexible even when the attic temp hits 140°F and then drops to 60°F at night. This prevents the bond-line failure that leads to those ‘mystery leaks’ that only happen during heavy wind. If you don’t seal it right the first time, you’ll be looking for signs of leaky pipe boots and other joint failures every time it drizzles.
4. Secondary Water Resistance (SWR) Barriers
In high-wind zones, the shingles are just your first line of defense. The real waterproofing happens underneath. Atทุก attic joint—valleys, rakes, and ridges—you must have a self-adhering modified bitumen membrane. This ‘Ice and Water’ shield (though we use it for rain in the South) seals around the shingle nails. It creates a gasket. If a gust of wind lifts a shingle, the joint remains watertight. Many roofing companies skip this or only use a thin felt paper that tears during installation. That is a recipe for a soggy attic and a moldy future.
5. Integrating Ridge Vent End Caps
The ridge is the highest joint on your roof, and often the most neglected. I’ve seen hundreds of roofs where the ridge vent simply stops two inches before the end of the peak, leaving a gaping hole for wind-driven rain to enter the attic. Using specialized end-caps and ensuring the sealant is applied to the underside of the last ridge shingle is the only way to prevent water from surfing the wind right into your insulation. This is precision work, and it’s where the ‘trunk slammers’ always fail. If you notice dampness near the peak, it’s likely a failure of these attic joint seals. Don’t wait for the ceiling to collapse; fix the physics of the roof today.