The Anatomy of a Winter Disaster: Why Your Gutters Are Failing
The sound is unmistakable. It’s a rhythmic, heavy thud—the sound of an eight-hundred-pound block of ice finally losing its grip on your aluminum gutters and crashing into the frozen mulch below. As a forensic roofing investigator for over twenty-five years, I have seen this movie a thousand times, and it always ends with a homeowner staring at a water stain on their ceiling, wondering where it all went wrong. Most roofing companies will tell you it’s just ‘weather.’ I’m here to tell you it’s physics. Specifically, it’s a failure of the building envelope to manage heat and moisture. My old foreman used to say, ‘Water is patient. It will wait for you to make a mistake, then it will invite its friends to rot your house from the inside out.’ In the frozen trenches of the North, that mistake is usually found in the gutters.
“Where the design of the roof or environmental conditions create a high probability of ice dams, a self-adhering polymer-modified bitumen sheet shall be installed.” – International Residential Code (IRC), Section R905.1.2
Step 1: The Forensic Attic Bypass Audit
Before you even look at a gutter, you have to look at your attic. The primary driver of gutter icing isn’t the cold; it’s the heat. Specifically, heat escaping from your living room into the attic space. This is known as an attic bypass. When warm air leaks through unsealed light fixtures, plumbing stacks, or the attic hatch, it warms the underside of the roof deck. The snow on top melts, flows down to the eave—which is cold because it overhangs the exterior of the house—and refreezes. This is the birth of an ice dam. Local roofers who know their craft will start by checking your R-Value and looking for thermal bridging. If you don’t stop the heat, you’re just heating the outdoors and creating a glacier on your fascia board.
[image_placeholder_1]
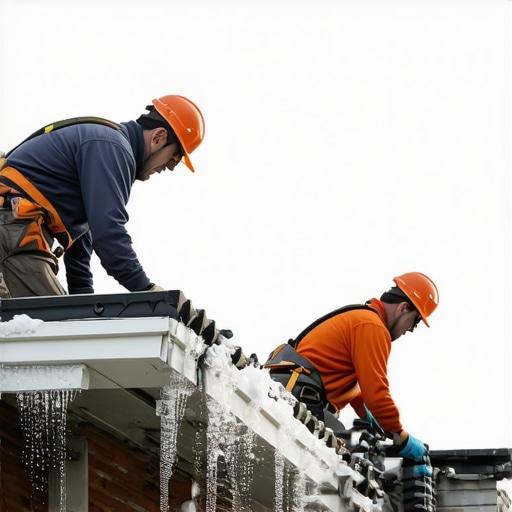
Step 2: Evaluating the Gutter Pitch and Structural Integrity
I’ve walked on roofs that felt like sponges because the gutters weren’t pitched correctly. If a gutter has even a slight back-slope, water sits. In 20°F weather, that standing water turns into a solid anchor. Once that first inch of ice forms, every subsequent drop of meltwater has nowhere to go but up. We’re talking about hydrostatic pressure. Water is heavy—roughly 62.4 pounds per cubic foot. When your gutters are choked with ice, that weight pulls on the spikes or hidden hangers, opening up gaps between the gutter and the fascia. Once water gets behind that metal, it starts eating the wood. If you see ‘tiger stripes’ (black streaks) on the front of your gutters, it’s a sign that water is already overtopping the system and likely rotting your rafter tails.
Step 3: The Physics of Self-Regulating Heat Cables
Most ‘trunk slammers’ will throw a cheap, constant-wattage heat tape from a big-box store onto your roof and call it a day. Those things are fire hazards waiting to happen. For 2026, the standard for local roofers is self-regulating polymer cables. These cables have a conductive core that becomes more conductive as the temperature drops, increasing heat output where it’s needed most and tapering off where it isn’t. You need to zig-zag these cables not just in the gutter, but up the first 24 inches of the roof slope in a ‘V’ pattern. This creates melt-paths that allow water to reach the gutter instead of pooling behind an ice wall. Without these paths, the water will find a ‘shiner’—a missed nail in the roof deck—and follow it straight into your insulation.
“A roof is only as good as its flashing and its ability to shed water away from the structure, not just hold it.” – Old Roofer’s Adage
Step 4: The Secondary Water Resistance (SWR) Layer
If you’re hiring roofing companies for a replacement, you must insist on a high-temp Ice & Water Shield. In cold climates, this membrane should extend from the eave’s edge to at least 24 inches inside the interior wall line. This is your last line of defense. When capillary action draws water upward under the shingles—a process where the surface tension of the water actually pulls it uphill against gravity—this membrane seals around every nail penetration. I’ve seen roofs where the shingles were perfectly fine, but the lack of an SWR layer meant the plywood turned to mush because of simple winter condensation. If your roofer isn’t talking about ‘starter strips’ and ‘drip edge’ integration with the SWR, they aren’t a forensic professional; they’re a shingle flipper.
Step 5: Professional Gutter De-Icing Maintenance and the ‘Cricket’ Defense
Finally, you need to look at the ‘valleys’ and ‘crickets’ of your roof. These are the areas where two roof planes meet, or where water is diverted around a chimney. These are the high-velocity lanes for meltwater. If these aren’t cleared of debris, they become the primary sites for massive ice accumulation. A ‘cricket’ is a small peaked structure behind a chimney that diverts water; if this is buried in snow, the chimney flashing will eventually leak. Local roofers should be hired annually to check these critical junctions. Don’t wait until you’re staring at a four-foot icicle that looks like a translucent spear aimed at your gas meter. The cost of prevention is a fraction of the cost of a full forensic restoration after the wood rot has set in.