The Anatomy of an Eave Failure
Walking on that roof felt like walking on a sponge. I knew exactly what I’d find underneath before I even pulled my pry bar. The homeowner was complaining about a ‘small’ leak in the kitchen ceiling, but up on the edge, the story was much uglier. In my 25 years as a forensic roofing investigator, I’ve seen this movie a thousand times. Local roofers often treat the drip edge like a decorative molding—an afterthought to be slapped on with whatever scrap is left in the truck. But in our humid, salt-heavy air, that piece of metal is the only thing standing between your structural rafters and total rot. By the time 2026 rolls around, we are going to see a massive wave of failures from the low-bid installs of the early 2010s reaching their breaking point. This isn’t just about a rusty strip of metal; it’s about the physics of water and the inevitable decay of neglected defenses.
“The drip edge shall be mechanically fastened to the roof decking… and shall be corrosion-resistant.” – International Residential Code (IRC) R905.2.8.5
1. The ‘White Rust’ Pitting and Surface Bubbling
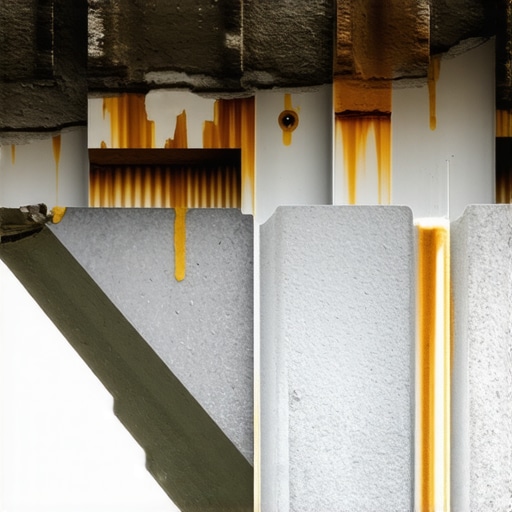
When you look up at your eaves, you shouldn’t see what looks like white powder or bubbling paint. That’s not just dirt. In our tropical climate, salt air acts as a catalyst for oxidation. Aluminum drip edges are common, but if they aren’t high-grade or if they were scratched during a sloppy install, the protective layer is gone. You start seeing ‘pitting’—tiny microscopic holes where the metal is literally being eaten away. Once those pits form, capillary action kicks in. Water doesn’t just sit there; it gets sucked into those tiny voids, staying in constant contact with the wood underneath. If you see white oxidation or paint flaking off the edge, the metal has already lost its structural integrity. Local roofers who know their salt will tell you that once the finish is breached, the clock is ticking.
2. The ‘Shadow Line’ on the Fascia Board
The job of a drip edge is to direct water away from the house and into the gutter. It requires a specific ‘kick-out’ angle. If the metal is corroding, it loses that crisp edge. Instead of the water breaking its surface tension and falling into the trough, it follows the curve of the corroded metal back toward the house. This creates a ‘shadow line’ of dark moisture on your fascia boards. Go outside after a heavy rain and look at the wood behind the gutter. If it’s damp, your drip edge has failed. Water is now wicking into the end grain of your fascia. Eventually, that wood turns to mush—I’ve seen fascia boards so rotten you could put your thumb through them like they were wet cake. This is where the smell starts—that heavy, earthy scent of decaying timber that attracts every termite in the county.
3. Shingle Lifting at the Starter Course
Physics doesn’t care about your warranty. When the drip edge corrodes, it often expands. This expansion creates a physical lift at the very edge of your roof—the starter course. This is the most vulnerable part of the roof for wind uplift. When those shingles start to arch or lift because the metal underneath is crumbling, you’ve lost your seal. In a high-wind event, the wind gets under that lifted edge and peels your roof back like a sardine can. I’ve investigated ‘hurricane damage’ that was actually just ‘bad drip edge’ damage. The wind didn’t break the roof; the corroded metal gave the wind a handle to grab onto. Look for shingles that seem to be ‘floating’ or aren’t flush with the metal edge.
“A roof is only as good as its flashing.” – Old Roofer’s Adage
4. The Galvanic Nightmare: Dissimilar Metal Corrosion
This is where ‘trunk slammers’ really screw up. If a roofer uses galvanized nails to secure an aluminum drip edge, or vice versa, they’ve created a battery. In our humidity, these two different metals react chemically. This is galvanic corrosion. I’ve pulled off edges where the metal around the nail head had completely disappeared, leaving ‘shiners’—nails that aren’t holding anything. The drip edge is basically just sitting there, held in place by habit and a bit of dried sealant. You’ll see rust streaks bleeding down from the nail points. This isn’t just a cosmetic issue; it means your perimeter defense is no longer attached to the deck. If you can move the drip edge with your pinky finger, your local roofers didn’t understand basic chemistry.
5. The Gutter Trough ‘Sediment’
Clean your gutters and look at what’s in the bottom. If you see flakes of metal mixed in with your asphalt granules, your drip edge is disintegrating from the inside out. The underside of the metal—the part touching the wood—often corrodes faster than the visible side because it stays wet longer. It never gets the chance to dry out in the sun. This hidden corrosion is the most dangerous because it hides the rot. You think everything is fine because the top looks okay, but the ‘lip’ that sits in the gutter is turning into metallic dust. By the time you notice the water on your dining room table, the repair bill has tripled because now we’re replacing the plywood deck, the fascia, and the soffits.
The Forensic Fix: Surgery Over Band-Aids
Don’t let anyone tell you they can just ‘seal’ a corroding drip edge with a tube of caulk. That’s like putting a Band-Aid on a gunshot wound. If the metal is compromised, it has to come out. This is a surgical process. You have to carefully lift the starter course of shingles—without breaking the adhesive bond of the second course—remove the old fasteners, and slide in a new, heavy-gauge, factory-finished drip edge. You need to ensure the new metal has a proper ‘kick-out’ and is integrated with a high-quality underlayment like a secondary water resistance (SWR) barrier. Anything less is just delaying the inevitable. When you hire roofing companies, ask them specifically about their drip edge gauge and material. If they don’t mention ‘corrosion resistance’ or ‘galvanic isolation,’ keep looking. You want a pro who treats the edge of the roof with as much respect as the center.