The Forensic Autopsy of a Wet Ceiling
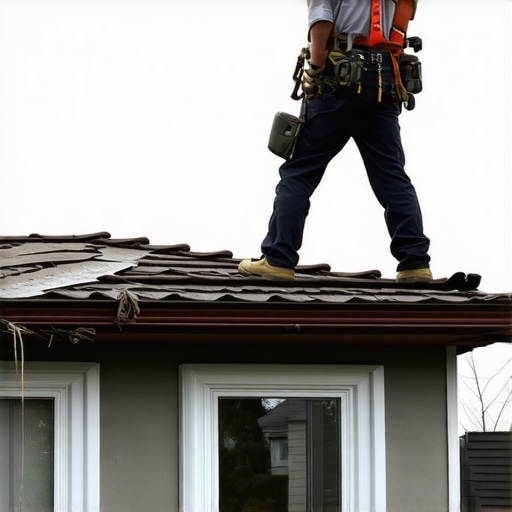
Walking on that roof felt like walking on a sponge. I knew exactly what I’d find underneath: a substrate so saturated it had the consistency of wet cardboard. This wasn’t a sudden catastrophe; it was the inevitable result of a wind-driven rain event that exploited a few loose shingles months ago. In the high-humidity environments of the Southeast, where the air feels like a warm, wet blanket, your roof isn’t just a cover—it’s a pressurized seal fighting against tropical deluges. When that seal breaks, water doesn’t just fall; it migrates. It uses capillary action to pull itself uphill, sneaking between the laps of your shingles and finding the smallest path of least resistance. Usually, that path is a shiner—a nail that missed the rafter—which acts as a perfect metal conduit for water to bypass your decking and soak directly into your attic insulation.
“Roof assemblies shall be designed and installed in accordance with this code and the approved manufacturer’s installation instructions.” – International Residential Code (IRC) R903.1
The Physics of Failure: Why Your Living Room is Leaking
Most homeowners think a leak is a straight line. It isn’t. Water is patient and deceptive. When a gust of wind causes shingle lifting, it creates a momentary vacuum that sucks moisture under the asphalt layer. Once the water is under the shingle, it hits the underlayment. If your roofer was a trunk-slammer who used cheap felt instead of a high-quality synthetic, that felt will wrinkle and hold the water against the plywood. Eventually, hydrostatic pressure wins. The water finds a seam or a nail hole and begins its journey into your home. This is where the real damage starts. The fiberglass batts in your attic act like a giant sponge, holding gallons of water before a single drop hits your drywall. By the time you see a brown circle on your ceiling, you’ve likely got fifty pounds of wet insulation ready to pull the entire ceiling grid down.
Step 1: Immediate Containment and Hydrostatic Relief
The first step in Emergency Roof Services isn’t actually on the roof; it’s in your living room. You need to manage the weight. If you see a bulge in the drywall, don’t just put a bucket under it. Take a screwdriver and poke a small hole in the center of that bulge. It sounds counterintuitive to damage your ceiling more, but you are relieving the hydrostatic pressure. By letting the water flow freely into a container, you prevent the water from spreading laterally and rotting out more of your ceiling joists. This is the frontline of defense for immediate leak storm patches and interior mitigation.
Step 2: The Attic Reconnaissance
Put on a mask and get into the attic, even if it’s 140°F up there. You need to find the entry point, but remember: where the water drips isn’t where the hole is. Water often enters at a valley or a cricket—that small peaked structure behind your chimney—and then runs down the underside of the rafters for ten feet before dripping. Look for the ‘shiners’ that are rusted or have water beads hanging from them. If you can identify the rafter that is wet, follow it up to the highest point. This forensic approach is the only way to provide local roofers with the information they need to perform a surgical fix rather than a blind guess.
Step 3: Temporary Exterior Shielding (The Tarping Game)
When the storm breaks, the tarp goes on. But here is where most people fail. You never nail a tarp directly into the shingles in a way that creates more holes. You use 2×4 furring strips to sandwich the tarp and wrap it over the ridge. This uses the weight of the wood and the geometry of the roof to hold the seal. In tropical zones, wind uplift is your biggest enemy. If you don’t secure the edges of that tarp, the next 40mph gust will turn it into a sail, potentially ripping even more shingles off your square (100 square feet) of roofing. For those looking for long-term solutions, investigating how to stop attic leaks forever is the next logical step after the tarp is secure.
“A roof is only as good as its flashing.” – Old Roofer’s Axiom
Step 4: Vetting Your Emergency Help
The sound of chainsaws and hammers after a storm brings out the worst in the industry. You’ll have guys knocking on your door who aren’t even from your state, let alone your city. They will offer a ‘free roof’ through your insurance. Be wary. A legitimate company will have no problem showing you their General Liability and Workers Comp certificates. If they fall off your roof and they aren’t covered, you are the one who gets sued. Always take the time to perform a valid insurance check before letting anyone step onto your property with a tear-off bar.
Step 5: Documenting for the Adjuster
Insurance adjusters are trained to minimize the payout. They will look for ‘pre-existing wear and tear’ or ‘lack of maintenance.’ To fight this, you need a forensic record. Take photos of the lifted shingles, the rusted shiners in the attic, and the saturated insulation. Show the mechanism of failure. If you can prove that the wind caused the uplift that allowed the water entry, your claim is much stronger. Don’t let them tell you it’s just a ‘repair’ if the structural integrity of the decking is compromised. If the plywood is delaminated, it’s a full replacement job.
The Cost of Hesitation
Waiting to address a leak in a tropical climate is a recipe for mold. Within 48 hours, the damp, dark, hot environment of your attic will start producing spores that can compromise your family’s health. Emergency mitigation isn’t about making the house look pretty; it’s about stopping the biological and structural clock. Get the water out, get the air moving with high-velocity fans, and get a professional who knows the difference between a cosmetic fix and a structural restoration. A real pro will look at your valleys and drip edges to ensure that once the repairs are done, the system works as a cohesive unit to shed water, not trap it.