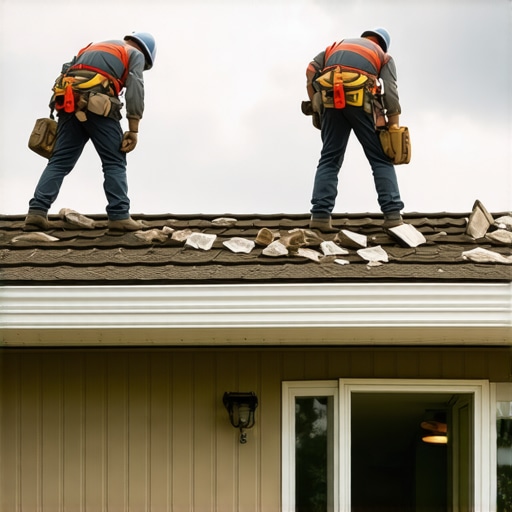
The Anatomy of an Aerial Assault: When the Sky Opens Your House
The sirens have stopped, the sky has that eerie bruised-purple hue, and the air smells like wet cedar and pulverized insulation. You’re standing in your living room, but you can see the clouds. This isn’t just a leak; it’s a structural violation. When a tornado-force wind screams over your ridge, it doesn’t just ‘blow’ on the house—it creates a massive pressure differential. Walking on that roof felt like walking on a sponge. I knew exactly what I’d find underneath: delaminated OSB that had absorbed so much moisture it was twice its original thickness, turning a structural component into a soggy mess that couldn’t hold a nail if its life depended on it. As a forensic roofer, I’ve seen this scene a thousand times, and the biggest mistake homeowners make is thinking the visible hole is the only problem.
The physics of a tornado hit are brutal. You have the impact damage from flying debris—limbs, shingles from three streets over, even pieces of lawn furniture—and then you have the uplift forces. As wind accelerates over the peak of your roof, it creates a vacuum. If your shingles weren’t installed with the proper six-nail pattern, or if the adhesive strip had already failed due to age, the wind starts ‘unzipping’ the field. It begins at the eaves or the rake edges and peels back whole sections. Once that happens, the decking is exposed to pressurized, wind-driven rain that doesn’t just fall; it’s forced into every crack and crevice via capillary action, moving sideways and even upward under the remaining materials.
“The roof system shall be designed and installed to resist the wind loads as determined in accordance with this code.” – International Residential Code (IRC) R905.1
Step 1: The Tarping Game and Immediate Stabilization
Before you even think about calling an adjuster, you need to stop the bleeding. In the roofing trade, we call this ‘drying in.’ It’s not about making it pretty; it’s about preventing that wet plywood from turning into oatmeal. If you have a hole, you need a heavy-duty tarp, but don’t just throw it over and hope for the best. You have to ‘sandwiched’ the tarp between 2x4s and screw them into the rafters. Don’t use a hammer; the vibration can shake loose more shingles or damage internal plaster. If the damage is extensive, immediate leak storm patches are your only defense against secondary mold growth that can start in as little as 24 to 48 hours in the humid aftermath of a storm.
Watch out for ‘shiners’—those are the nails that missed the rafter and are just sticking through the plywood. In an emergency situation, these act as heat sinks and moisture collectors. If you’re up there (which I don’t recommend for a civilian), keep an eye on the cricket—that small peaked structure behind your chimney. Tornadoes love to rip those off, creating a massive funnel for water to pour directly into your attic. If you’re dealing with a large-scale disaster, you might need professional emergency roof services to handle heavy debris that’s physically pinned to the deck.
Step 2: Forensic Documentation (Beating the Adjuster at Their Own Game)
Insurance adjusters are trained to minimize the ‘scope of work.’ They’ll look for any reason to call the damage ‘pre-existing’ or ‘cosmetic.’ You need to be a detective. Take photos of everything: the shingles in your yard, the granules in the gutters, the water stains on the rafters. Look for functional damage. This is where the shingle’s integrity is compromised, not just where it looks ‘bruised.’ Use a high-quality camera to zoom in on the edges of the shingles. If the matting is exposed, the UV rays will bake it into a crisp in weeks. This is why identifying shingle lifting early is vital for your insurance claim.
Don’t let them tell you a ‘repair’ is enough if more than 25% of the roof is damaged. In many jurisdictions, if a certain percentage is compromised, the code requires a full replacement. You have to look at the valleys—those V-shaped channels where two roof planes meet. If the wind has shifted the shingles in the valley, the flashing is likely compromised, and a simple patch will never be watertight again. Water is patient; it will wait for the next drizzle to find the one nail hole your contractor missed and start the rot all over again.
Step 3: Navigating the Storm Chaser Minefield
The moment the clouds clear, the ‘trunk slammers’ arrive. These are the out-of-state roofing companies that follow the hail and wind paths. They’ll offer to ‘pay your deductible’—which is insurance fraud, by the way—and then they’ll do the cheapest job possible before disappearing into the next state. You need local roofers who have a physical office you can throw a rock at. Ask for their certificate of insurance. Don’t just take their word for it; call the carrier. You need to verify general liability and workers’ comp. If a worker falls off your roof and the company isn’t insured, your homeowner’s policy is on the hook.
Beware of the ‘Free Roof’ pitch. If it sounds too good to be true, you’re likely being set up for a low-quality install that will fail in five years. You need to identify common roofing scams before you sign any contingency agreement. A real pro will give you a detailed estimate broken down by the square (that’s a 10-foot by 10-foot area in roofer-speak) and will include everything from the drip edge to the ridge vent. If they don’t mention replacing the flashing, kick them off your property.
“A roof is only as good as its flashing.” – Old Roofer’s Adage
Step 4: The Physics of Reconstruction and Future-Proofing
If you’re replacing the roof, don’t just put back what was there. Tornado zones require higher standards. Look for Class 4 impact-resistant shingles. These have a polymer-modified asphalt that acts more like rubber than glass, allowing it to absorb the energy of flying debris without cracking the matting. Consider a Secondary Water Resistance (SWR) layer. This is a self-adhering underlayment that goes over the entire deck, not just the eaves. If the shingles blow off again, this ‘ice and water shield’ acts as a temporary roof that can keep your house dry for weeks.
Check the ventilation. Most ‘failed’ roofs I see weren’t killed by the wind; they were killed by heat and moisture from the inside. If your attic is 140°F in the summer, the shingles are being cooked from both sides, making them brittle and easy for the wind to snap. Ensure your ventilation system is up to date, with a proper balance of intake at the soffits and exhaust at the ridge. This reduces the ‘thermal shock’ that causes shingles to curl and lose their grip on the roof deck. Finally, make sure they use stainless steel or hot-dipped galvanized nails. In the humid Southeast, cheap electro-galvanized nails will rust out in a decade, leaving your shingles held on by little more than gravity and hope.
{“@context”: “https://schema.org”, “@type”: “HowTo”, “name”: “How to Handle Tornado Roof Damage”, “step”: [{“@type”: “HowToStep”, “text”: “Ensure the storm has fully passed and the structure is safe to approach. Document visible damage from the ground with photos.”}, {“@type”: “HowToStep”, “text”: “Apply a temporary tarp or emergency patch to exposed decking to prevent interior water damage.”}, {“@type”: “HowToStep”, “text”: “Contact a reputable local roofing company to perform a forensic inspection of the uplift and impact damage.”}, {“@type”: “HowToStep”, “text”: “File an insurance claim with detailed photo evidence and a professional scope of work to ensure full restoration.”}]}