The Anatomy of a Swayback Roof: A Forensic View
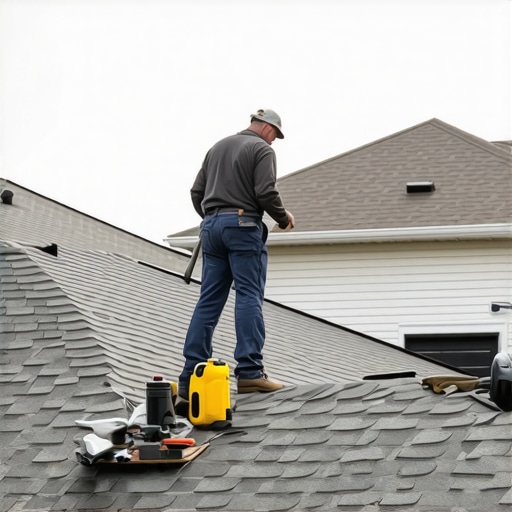
Walking onto that roof felt like stepping onto a trampoline made of wet crackers. I knew exactly what was happening before I even pulled my tape measure out. The ridge line didn’t just have a ‘dip’; it had a canyon. In my twenty-five years as a roofing investigator, I have seen hundreds of homeowners ignore a subtle curve in their roofline until the day they see a crack in their living room ceiling. Roof sagging isn’t just an aesthetic ‘quirk’ of an older home; it is a physics problem involving gravity, moisture, and the slow, inevitable failure of structural integrity. When you hire local roofers to address this, you aren’t just buying new shingles. You are performing surgery on the skeleton of your house.
“Roof rafters shall be sized and spaced in accordance with Table R802.5.1(1) through R802.5.1(8).” – International Residential Code (IRC)
To understand why your roof is bowing, we have to look at the Mechanism of Failure. Most sagging is the result of ‘Rafter Spread.’ Think of your roof as a triangle. The two angled sides are the rafters, and the bottom side—the ceiling joists—acts as a tension tie. If those ties aren’t properly fastened, or if the load becomes too great (think heavy snow or too many layers of asphalt), the rafters want to flatten out. As they push outward, they force the tops of your exterior walls apart, causing the ridge to drop. This isn’t just a leak risk; it is a collapse risk. If you are seeing a ‘wave’ in your roof, you are likely looking at delaminated sheathing or OSB that has turned into pulp due to poor attic ventilation. When heat and humidity get trapped in an attic, they cook the glue in the plywood. The wood loses its ‘stiffness’ and begins to drape over the rafters like a heavy blanket.
Fix 1: Sistering the Rafters (The Structural Reinforcement)
The most common forensic fix for a sagging roof that hasn’t completely failed is ‘sistering.’ This involves taking a new, straight piece of dimensional lumber—usually a 2×8 or 2×10—and bolting it directly to the side of the existing, curved rafter. But here is the catch that most ‘trunk slammer’ contractors miss: you can’t just slap a board up there. You have to ‘jack’ the roof back into its original plane first. We use hydraulic jacks and temporary bracing to slowly, carefully push the roof back to level. If you go too fast, you’ll crack the drywall throughout the entire second floor. Once the roof is true, the new ‘sister’ rafter is glued and through-bolted to the old one, effectively doubling the load-bearing capacity and locking the straight line back into place. We pay special attention to the ‘shiners’—those missed nails from previous jobs—as they often act as entry points for moisture that started the rot in the first place.
Fix 2: Installing Purlin Braces and Strongbacks
In many older homes, the rafters are ‘under-spanned.’ This means the distance they have to cover is too long for the thickness of the wood. To fix this without a total tear-off, we install a purlin system. A purlin is a long horizontal beam that runs perpendicular to the rafters. We support that purlin with ‘struts’ that transfer the weight down to a load-bearing interior wall. This effectively cuts the span of the rafters in half. It is the difference between a long, flimsy diving board and one with a support post in the middle. Local roofers who know their trade will ensure the struts are angled at exactly 45 to 90 degrees to maximize compression strength. This is ‘Trade 101,’ yet I see it botched constantly by roofing companies who think a roof is just a series of shingles.
Fix 3: The Ventilation Overhaul (Curing the Pulp)
If your roof feels ‘spongy’ underfoot but the rafters are straight, the problem is your sheathing. In high-humidity zones, poor ventilation turns your attic into a sauna. I’ve seen 140-degree attics where the OSB was literally disintegrating. The solution here is a total ‘re-deck.’ You strip the shingles down to the bone, rip off the rotten wood, and install fresh CDX plywood. But—and this is the critical part—you must fix the airflow. We install a continuous ridge vent and ensure the soffit vents aren’t blocked by insulation. If the attic can’t breathe, the new wood will be sagging again by 2030. We often find that ‘crickets’—those small peaked structures behind chimneys—were never installed, leading to water pooling and localized rot that spreads like a cancer across the deck.
“A roof is not a static object; it is a dynamic system of load transfer.” – Structural Engineering Axiom
Fix 4: Tension Ties and Collar Ties
If the issue is rafter spread (walls pushing out), we have to pull the house back together. This is where collar ties and tension ties come in. Collar ties are installed in the top third of the attic to prevent the ridge from pulling apart during high winds or heavy snow loads. Tension ties (ceiling joists) are reinforced at the ‘plate line’ to keep the walls from bowing. In some forensic cases, we use steel tension rods with turnbuckles to slowly pull the exterior walls back into plumb. It is a slow, methodical process. You don’t just tighten it all at once; you give the house time to ‘settle’ into its old shape. This is high-level roofing work that requires an understanding of the entire building envelope, not just how to swing a hammer and lay a square of shingles.
Conclusion: The Cost of a ‘Cheap’ Fix
When you see a dip in your roof, the clock is ticking. You can call the cheapest roofing companies you find, and they might offer to just ‘shim’ the roof—putting extra layers of shingles or wood strips in the dip to make it look flat. That is a death sentence for your home. It adds more weight to a failing structure. A real forensic fix addresses the physics of the sag. It ensures that the load is transferred to the foundation, that the wood is protected from moisture, and that the ventilation prevents future rot. Don’t wait until you’re looking at the sky through a hole in your ceiling. Get a pro who knows the difference between a shingle and a structural system.