The Anatomy of a Slow-Motion Disaster: When the Ridge Fails
It usually starts at 3:00 AM on a Tuesday in January. You are in Buffalo, and the wind is howling off Lake Erie at forty miles an hour. You hear a steady drip… drip… drip… hitting the drywall above your head. You think it is a roof leak, but when you call one of those local roofers to crawl up there, they tell you the shingles look fine. That is because the problem isn’t the shingle; it is the ridge vent. As a forensic roofing investigator for over two decades, I have seen it a thousand times. Most roofing companies treat the ridge vent as an afterthought—a plastic cap they nail down and forget. But in a cold climate, that ridge is the lungs of your house. If it is not sealed properly, your home is basically breathing in buckets of snow.
My old foreman, a man who had more scars on his hands than a career prize-fighter, used to tell me, ‘Water is patient, kid. It will wait for you to make a mistake, and then it will move in and start charging rent.’ He was right. When you ignore the micro-details of a ridge vent installation, you aren’t just risking a leak; you are inviting the physics of air pressure to destroy your decking from the inside out. I once inspected a home where the plywood had turned to something resembling wet shredded wheat because the installer skipped the end-plugs. Water didn’t just fall in; it was sucked in by the vacuum of the attic.
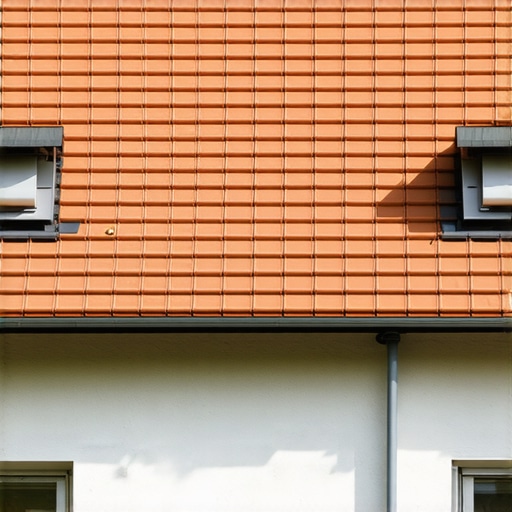
Sign 1: The ‘Rusty Shiner’ and the Physics of Attic Rain
The first sign of a poorly sealed ridge vent is often found in the attic, not on the roof. If you see ‘shiners’—those are nails that missed the rafter and are sticking through the decking—covered in orange rust or white frost, you have a major problem. This is a classic symptom of thermal bridging. When a ridge vent isn’t sealed at the edges, it allows cold exterior air to bypass the ventilation baffles and crash into the warm, moist air rising from your living space. This creates condensation on the underside of the roof deck. Eventually, that moisture travels down the nail shank and drips onto your insulation. This is why it is vital to check for signs of hidden attic dampness before the rot takes hold.
“Ventilation shall be provided at a rate of not less than 1 square foot of net free ventilating area for each 150 square feet of vented space.” – International Residential Code (IRC) R806.1
But the code only tells you how much air you need; it doesn’t tell you how to stop the wind from shoving snow under the vent. In a North/Cold climate, we use capillary action to our advantage. A proper ridge vent installation requires a continuous bead of high-grade sealant along the transition between the vent and the top course of shingles. Without this, the wind creates a venturi effect, pulling moisture sideways—uphill, essentially—past the primary defense of the shingle and directly onto the unprotected wood of the ridge beam.
Sign 2: The ‘Accordion Shingle’ and Thermal Expansion Stress
Look at your ridge line from the ground. Do the shingles covering the vent look wavy? Are they buckled or lifting? This isn’t just an aesthetic issue; it is a sign of improper fastening and sealing. Shingles are made of asphalt and fiberglass; they expand and contract as the temperature swings from -10°F to 40°F in a single winter day. If a ‘trunk slammer’ used a standard nail gun and blasted the nails through without pre-drilling or using the correct compression, the shingles will buckle under the pressure. This creates gaps where the sealant fails, allowing wind-driven rain to enter.
Many ways to seal attic gable ridge vents exist, but the most common failure is the omission of the end-plug. The ridge vent is a long, hollow channel. If the ends are left open, birds, bats, and blowing snow have an open highway into your home. I have seen attics with three-foot snowdrifts sitting directly on top of the master bedroom ceiling because a local roofer forgot a fifty-cent piece of foam at the end of the ridge run. This leads to catastrophic decking plywood decay that requires a full tear-off to repair.
Sign 3: Ice Dams Forming at the Peak
In a properly functioning cold-climate roof, the ridge should be the coldest part of the house because it is exhausting the warm air. If you see thick ridges of ice forming right at the very top of the roof—rather than at the eaves—your ridge vent is failing to seal the ‘thermal bypass.’ This happens when the vent is clogged or when the installer didn’t cut the slot in the plywood wide enough, but then tried to ‘fake it’ by installing the vent anyway. This traps hot air at the peak, which melts the snow on top of the vent. That water then runs down an inch, hits the cold overhang, and freezes, creating an ice dam at the highest point of the structure. It is a total reversal of how a roof is supposed to work.
“A roof is only as good as its flashing and its ability to breathe.” – National Roofing Contractors Association (NRCA) Guidelines
When you are interviewing roofing companies, ask them specifically how they handle the ‘transition seal.’ If they tell you they just nail it down, show them the door. You need someone who understands that the ridge is a high-pressure zone. They should be using a closed-cell foam baffle and a heavy bead of polyurethane sealant at the ends. Anything less is just a countdown to a mold claim. If you suspect your vent was hacked together, don’t wait for the next blizzard to find out. A forensic audit of your ventilation system can save you tens of thousands in structural repairs down the line.