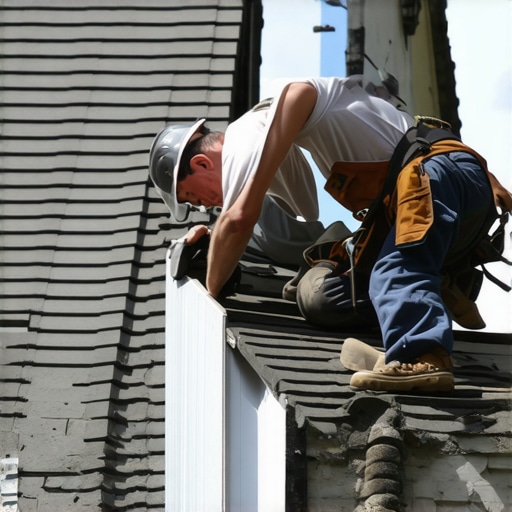
The Anatomy of a Ceiling Stain: Why Your Valley is Failing
You see that brown ring on your master bedroom ceiling? That’s not a leak. That’s a symptom of a systemic failure in the most violent part of your roof’s anatomy: the valley. As a forensic roofer with twenty-five years of pulling up rotted plywood, I can tell you that the valley is the roof’s throat. If it’s restricted or cut, the whole house bleeds. When you’re dealing with the humidity and the sideways rain of the Gulf Coast, a loose valley seam isn’t just an inconvenience; it’s a direct invitation for rot to settle into your rafters. My old mentor, a man who could smell a leak through three layers of shingles, used to tell me, ‘Water is patient. It will wait for you to make a mistake, then it will move in and start charging rent.’ He was right. Water doesn’t just fall; it uses capillary action to crawl sideways under your metal flashing, defying gravity until it finds a shiner—a missed nail—to follow down into your attic.
“Valleys shall be installed with a corrosion-resistant metal of not less than No. 26 gage or other approved materials.” – International Residential Code (IRC) R905.2.8.2
The Physics of the Failure: Why Flashing Pulls Away
In the Southeast, we don’t just worry about rain; we worry about thermal shock. Your roof can hit 160°F by noon and then get hit by a 75°F thunderstorm. That metal valley flashing expands and contracts like a living thing. If it wasn’t secured with the right tension or if the local roofers used standard galvanized nails instead of stainless steel, the salt air and thermal movement will back those fasteners right out of the wood. This leaves a gap. Once that gap exists, wind-driven rain gets forced under the shingles. This is why you might notice [shingle lifting] long before you see water on the floor. The water builds up hydrostatic pressure, pushing past the underlayment and soaking the deck. If you ignore this, you’re looking at [rotten fascia boards] and eventually a structural collapse of the valley itself.
Fix 1: The Cleat Reinforcement (The Structural Fix)
Most roofing companies just nail through the face of the metal. That’s a rookie move. To fix a loose seam properly, you need to use a continuous cleat. This involves tucking a metal strip under the existing flashing and securing it to the deck, then hooking the valley metal over it. This allows the metal to move during thermal expansion without backing out the nails. It’s the difference between a band-aid and actual surgery. If you’re seeing signs of [hidden shingle lifting], it’s often because the metal is buckling and pushing the shingles up from beneath.
Fix 2: Integrating Secondary Water Resistance
If the seam is loose, the underlayment beneath it is likely compromised. We don’t just ‘caulk’ it. You have to peel back the first two rows of shingles and install a high-temperature Ice and Water shield. In tropical climates, this ‘sticky’ underlayment acts as a self-healing gasket around the fasteners. Without this, you’re just one hurricane away from a total failure. If you don’t seal these joints, you’ll find [water entry at attic joint seals] faster than you can find a bucket to catch the drips.
Fix 3: Hemming the Edges for Wind Resistance
Loose flashing often starts at the edges where the wind gets a grip. By ‘hemming’ the edge of the metal—folding it back on itself—you create a stiffening rib that prevents the metal from flapping. I’ve seen roofing companies leave raw edges that vibrate in high winds, eventually tearing the sealant and letting water in. A proper hem creates a water-tight lock that resists the uplift forces of a tropical storm.
Fix 4: Correcting the Nailing Pattern (Avoiding Shiners)
I can’t tell you how many times I’ve seen a ‘professional’ job where the nails were driven directly into the center of the valley. That’s the low point. That’s where the water is deepest. You must nail at least 6 inches away from the center line. If you have loose flashing, we often have to pull the ‘shiners’ and seal the holes with [bio-based roof shingle sealants] to prevent further rot while repositioning the fasteners into fresh wood.
“Flashings shall be installed in a manner that prevents moisture from entering the wall and roof through joints in copings, through moisture-permeable materials and at intersections with parapet walls and other penetrations.” – NRCA Roofing Manual
Fix 5: The Cricket Diversion
If your valley dumps into a chimney or a vertical wall, the flashing will always work loose because of the sheer volume of water. We install a cricket—a small peaked roof structure—to divert water away from the seam. This takes the pressure off the flashing and allows the valley to breathe. Without a cricket, the valley acts like a dam, and no amount of flashing will stay secure under that much weight. If you’ve had a bad storm recently, you should [check for post-winter checkups] or post-storm damage immediately before the mold starts to grow in the dark corners of your attic.
The Cost of Hesitation
Waiting to fix a loose valley is a gambler’s game. Every afternoon thunderstorm is another gallon of water being wicked into your insulation. Once that insulation gets wet, it loses its R-value and starts growing black mold. You’ll go from a $500 flashing repair to a $15,000 deck replacement in a single season. Don’t let a ‘trunk slammer’ tell you a tube of caulk will fix it. Get a forensic inspection and make sure the metal is locked down for the long haul. Your roof is the only thing between your family and the elements; treat it like the shield it’s supposed to be.