The Death of a Roof: Why Those Black Streaks are Killing Your Home
I’ve spent twenty-five years crawling over steep-sloped pitches and navigating 140-degree attics, and if there is one thing I’ve learned, it’s that most homeowners are accidentally murdering their roofs. You see those black streaks on your shingles and think it’s just dirt. It’s not. It’s Gloeocapsa magma—a hardy, photosynthetic cyanobacteria that feeds on the limestone filler in your shingles. It’s literally eating your house. My old foreman, Salty Mike, used to pull me aside after a tear-off and point to the piles of ceramic granules in the gutter. He’d say, ‘Water is patient, kid, but chemicals and pressure are impatient. Most people kill their roof trying to save it.’ He was right. When you see those streaks, you are looking at a forensic scene of slow-motion structural decay. If you don’t handle it right, you’re just accelerating the date you have to call local roofers for a five-figure replacement. This isn’t about curb appeal; it’s about the physics of material science and moisture management. If you ignore the science, you’ll eventually deal with [roof-inspection-3-signs-of-hidden-decking-plywood-decay-fast-early-fast-early-fast-early-fast-early-fast-early-fast-early-fast-early-fast-early-fast-early], which costs triple to fix. Let’s break down the hacks that actually work without stripping your shingles down to the fiberglass mat.
“Proper roof maintenance includes the periodic removal of debris and organic growth to prevent the premature degradation of the roofing membrane and surfacing.” — National Roofing Contractors Association (NRCA)
The Forensic Physics of Cleaning: Why Pressure is the Enemy
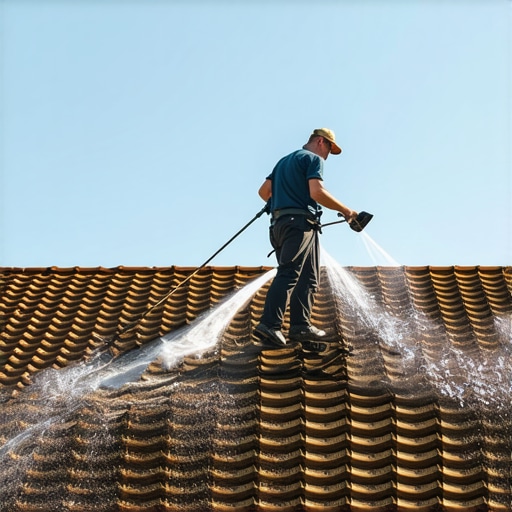
Before we get to the hacks, let’s talk about why you should never, ever touch a pressure washer to your roof deck. A shingle is a composite material. You have a fiberglass or organic felt base saturated with asphalt, topped with ceramic granules. Those granules aren’t there for decoration; they are the UV armor. They protect the asphalt from the sun’s radiation. When you hit those granules with 3,000 PSI of water, you are essentially sandblasting your roof. You’ll see the ‘dirt’ disappear, but you’ll also see a ‘shiner’—that’s a nail that was driven wrong—and a lot of shiny, exposed asphalt. Once that asphalt is exposed, the sun cooks it, it becomes brittle, and the next wind storm will have your shingles flapping like a loose shutter. Instead of pressure, we use the chemistry of surface tension and capillary action. We want the cleaning solution to move sideways under the overlap, just like water does during a wind-driven rain event, to kill the roots of the algae without mechanical force.
Hack 1: The ‘Soft Wash’ Chemical Cocktail
The first hack is the only one I truly trust: the chemical soft wash. You don’t need a fancy machine; you need a five-gallon bucket and a dedicated garden sprayer. The mixture is non-negotiable. You want a 50/50 mix of water and 6% sodium hypochlorite (standard laundry bleach). To this, you add a tablespoon of surfactant—dish soap works, but a professional-grade surfactant is better because it prevents the mix from drying too fast. Why this mix? Because sodium hypochlorite is the only thing that effectively breaks down the protective sheath of the Gloeocapsa magma. When you apply it, you must start from the bottom and work up toward the ridge. If you start at the top, the chemicals will run down and create ‘channels’ through the dry algae, leading to an uneven clean. You want to saturate the square (that’s 100 square feet in trade talk) and let it dwell for 15 to 20 minutes. You’ll see the black streaks turn brown, then clear. That is the sound of the algae dying. If you want more details on prevention, check out these [local-roofers-5-ways-to-stop-algae-growth-stains].
[image_placeholder]
Hack 2: The Zinc or Copper Leeching Method
If you don’t want to be up on a ladder every two years, you need to understand the chemistry of heavy metals. Have you ever noticed that the shingles directly below a galvanized chimney flashing or a lead vent pipe are perfectly clean? That’s not a coincidence. When rain hits zinc or copper, it creates a metallic salt solution that is toxic to algae and moss. The hack is simple: install a 6-inch strip of zinc or copper along the ridge of your roof. You leave about two or three inches exposed. Every time it rains, a tiny amount of metal ions will wash down the roof, creating a permanent ‘kill zone’ for organic growth. It’s like a slow-release medicine for your shingles. I’ve seen roofs that looked like a swamp everywhere except for the five feet directly below a copper cricket (the small peak behind a chimney used to divert water). It works, it’s cheap, and it’s a one-time install that keeps you from having to call roofing companies for repeated cleanings.
Hack 3: The Low-Pressure ‘Oxygen’ Alternative
For those who hate bleach because it kills the prize-winning hydrangeas in the flower beds, there is the oxygen bleach hack (sodium percarbonate). This is much safer for the environment but requires more ‘elbow grease’ in the form of dwell time. You mix the powder with warm water until it’s fully dissolved. It works by releasing oxygen, which physically lifts the algae and moss from the shingle surface. The ‘mechanism zoom’ here is the bubbling action; it gets into the tiny crevices around the granules. However, you cannot let this dry on the roof. If it dries, it leaves a white film that’s a nightmare to rinse. This hack is best for valleys where moss tends to accumulate due to the concentrated water flow. Speaking of moss, if that’s your primary battle, you should look into [local-roofers-5-ways-to-stop-moss-growth-stains] for specific strategies that differ from algae treatment.
Hack 4: The Gutter Hygiene Loop
The biggest mistake in DIY roof cleaning isn’t the roof itself; it’s the gutters. When you clean a roof, you are sending a massive amount of chemical runoff and dead organic matter down the pitch. If your gutters are clogged or the pitch is off, that toxic slurry sits in the gutter and eats away at the gutter straps or leaches into your fascia board. I once tore off a roof where the entire eave had rotted because the homeowner cleaned the roof but let the debris sit in the gutters for six months. You must flush your gutters with fresh water for at least 30 minutes after any chemical application on the roof. This dilutes the chemicals and ensures the debris doesn’t create a ‘dam’ that leads to water backing up under the starter shingle. While you’re down there, keep an eye out for [roofing-services-5-signs-your-gutter-straps-are-loose] to ensure the weight of the water doesn’t pull your drainage system off the house.
“Roofing systems shall be designed and installed in accordance with this code and the manufacturer’s installation instructions.” — International Residential Code (IRC), Section R903.1
The Forensic Reality Check: When Cleaning Won’t Save You
Cleaning is a maintenance task, not a repair. If you are cleaning the roof and you see ‘granule blizzards’ coming out of the downspouts, your roof is likely past its prime. No amount of bleach will fix shingles that have lost their flexibility. If the edges of the shingles are curling or if they feel brittle like a cracker when you lift a corner, cleaning them might actually make the leaks worse by removing the organic ‘gunk’ that was technically sealing a gap. Before you start any DIY project, walk the perimeter. Look for shingle lifting or missing tabs. If you see signs of structural distress, skip the cleaning and call a professional for a real forensic inspection. A clean roof that leaks is still a failure. Roofing is about the integrity of the thermal envelope, not just looking good for the neighbors. Take care of the shingles, and they’ll take care of you. Treat them like a sidewalk, and you’ll be buying a new roof before you’ve even paid off the old one.